Add a Deal (manually)
Rotabull receives and processes RFQs from your connected marketplaces. For each of these RFQs a Deal is automatically created in Rotabull, but you can also manually add a deal from the Deals page. This feature is useful if you received an RFQ over phone or email that you need to add to Rotabull.
To add an RFQ manually, click the Add Deal button on the bottom left of your Deals inbox and select "RFQ". If you have enabled payments in your Rotabull account (see here), there will also be an option to add an invoice.
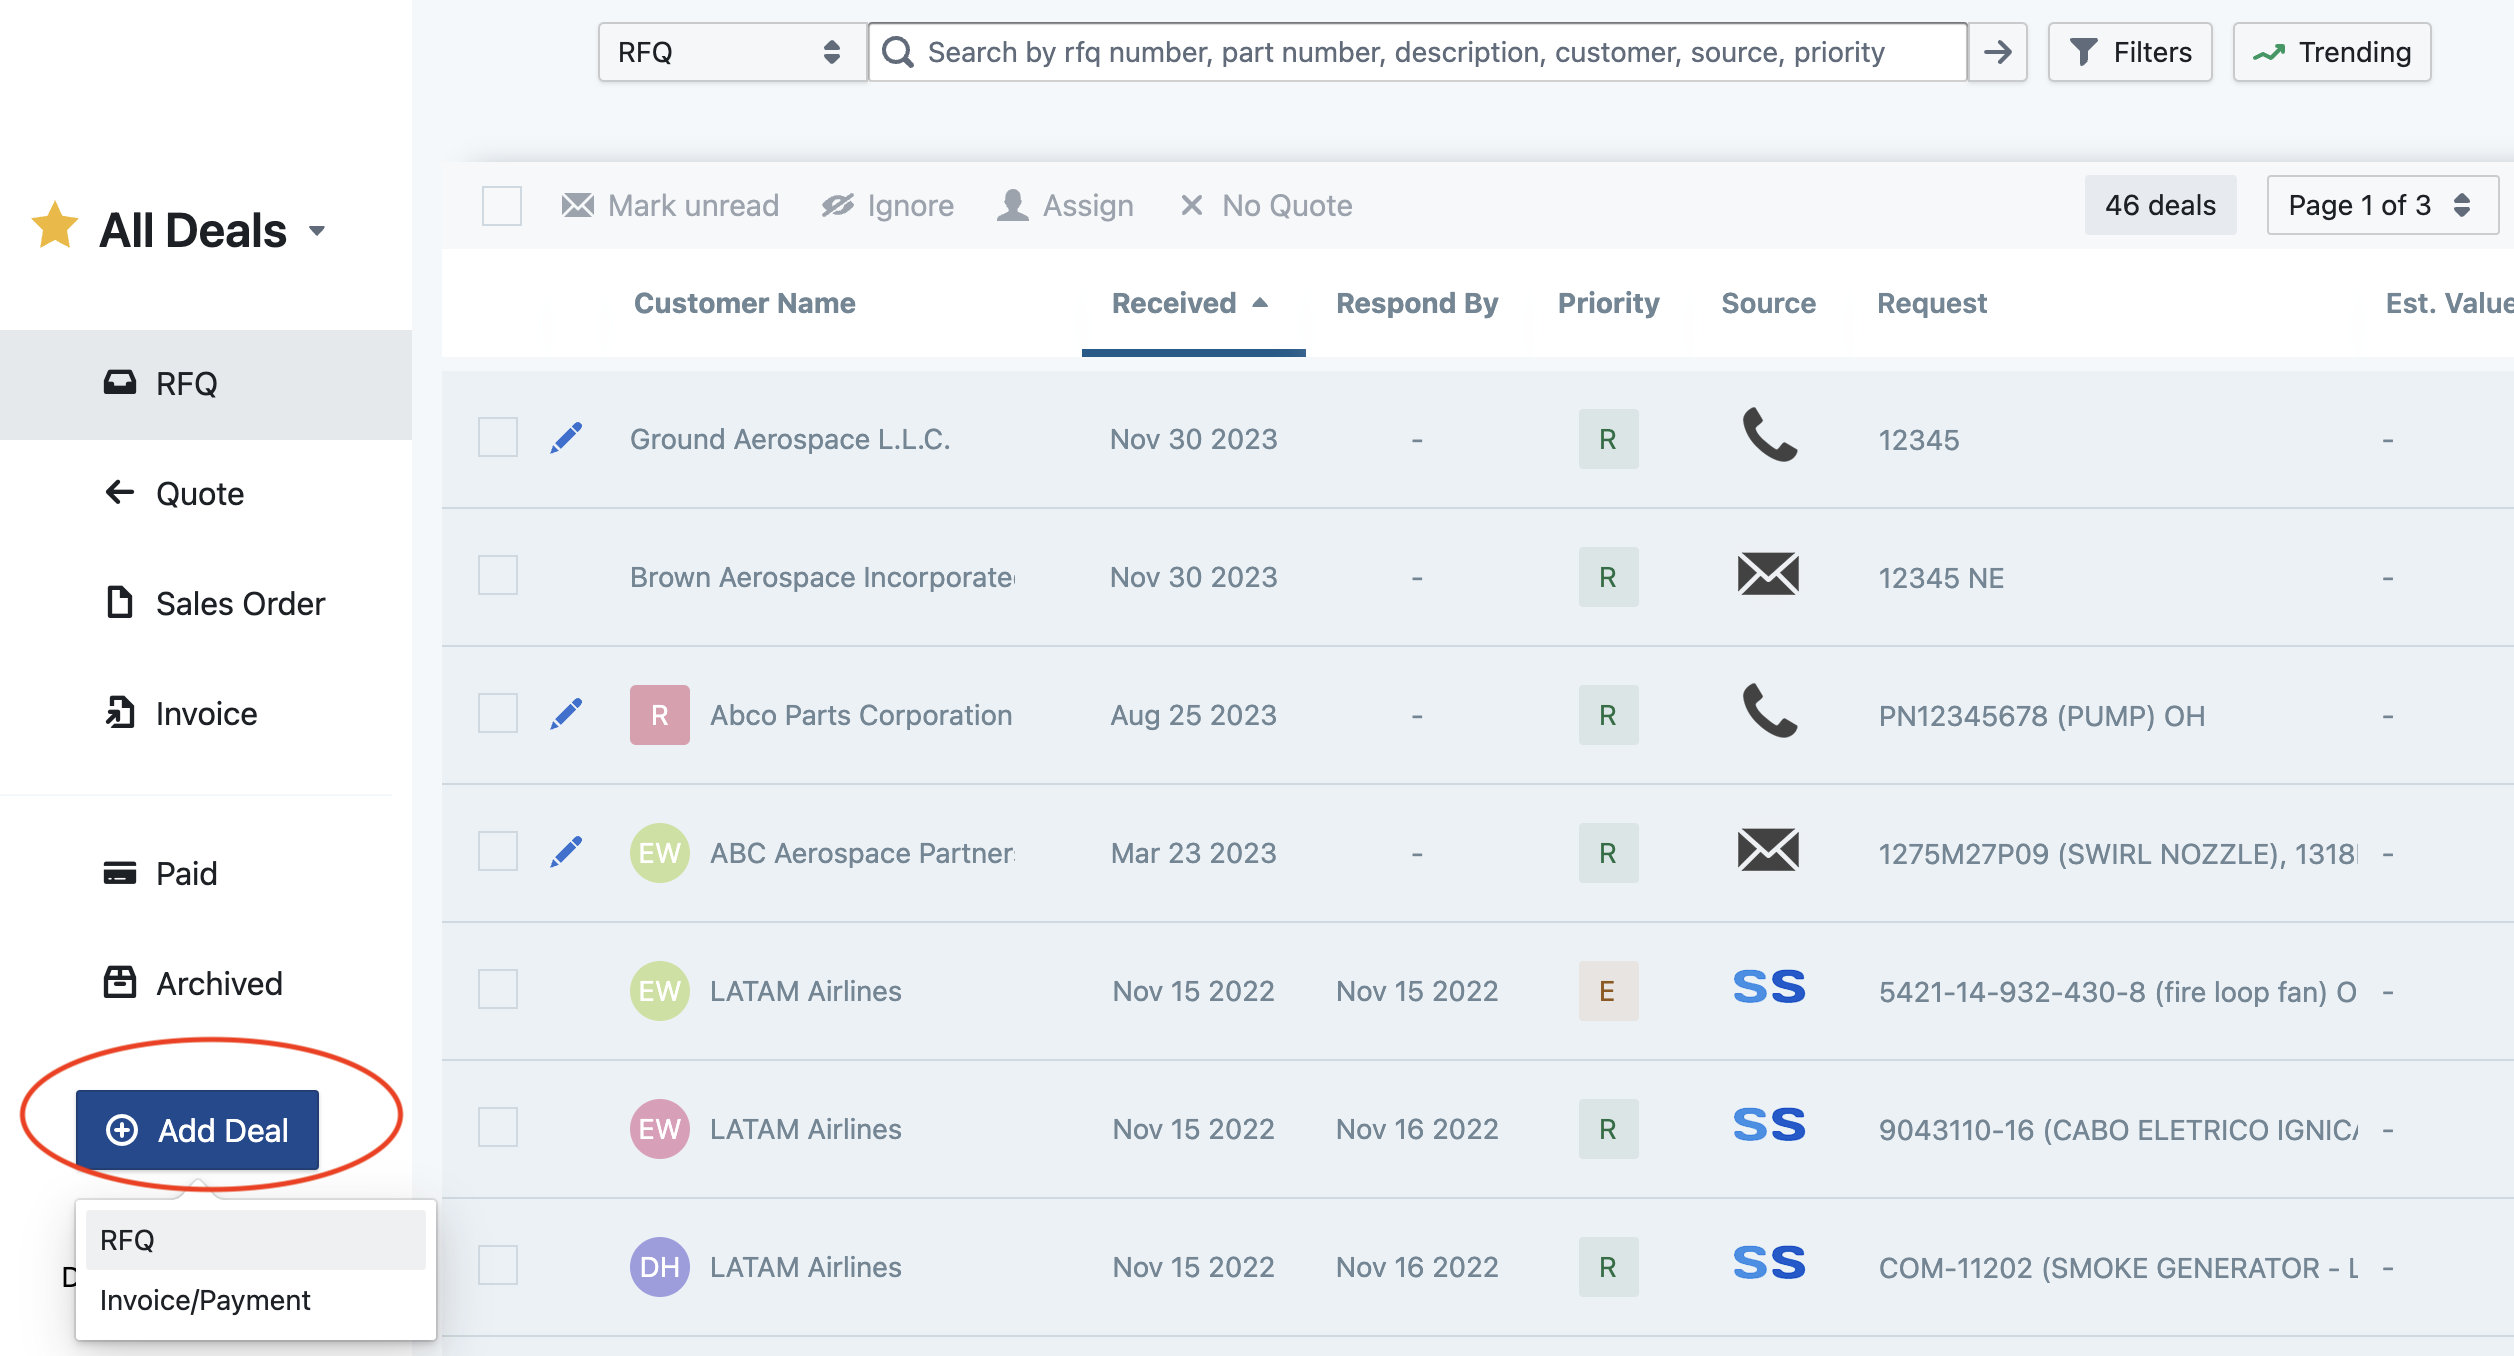
Clicking on either RFQ or Invoice/Payment will take you to their respective forms:
Manual Deal Creation - RFQ
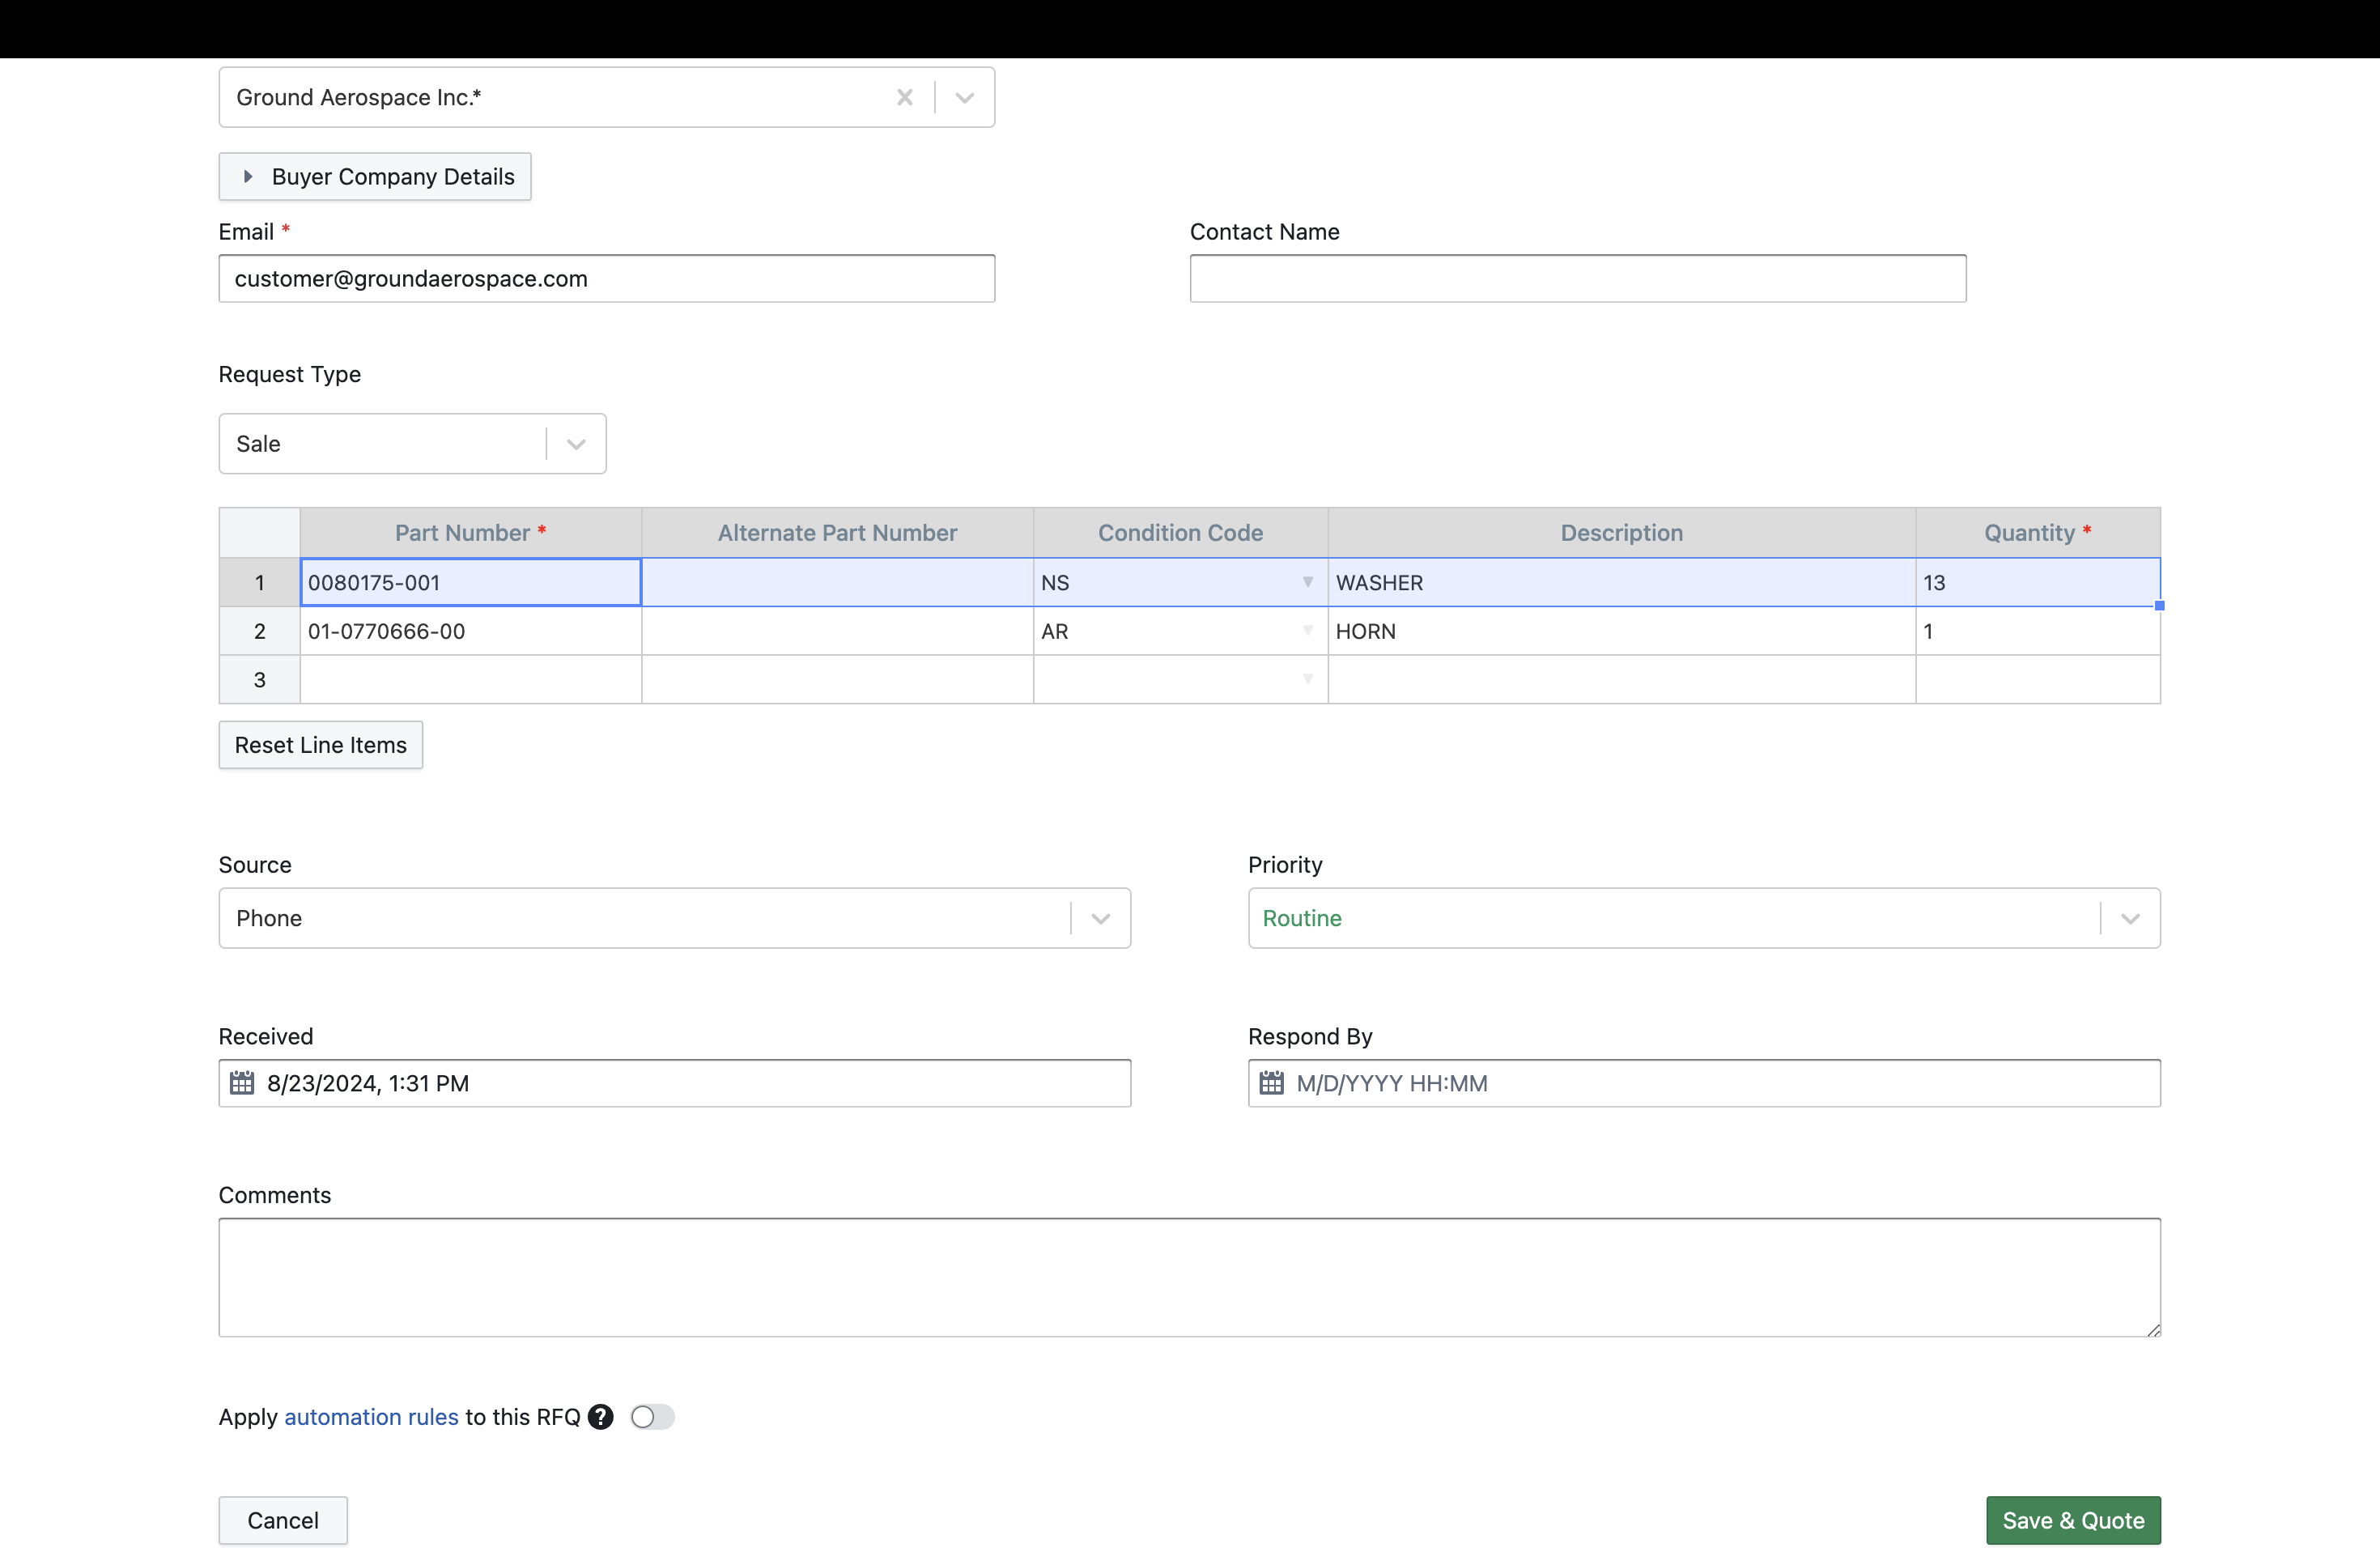
Here you can enter the information for the RFQ you are creating. There are a few required fields:
Buyer Company Name: Add a company from the existing list of buyers in your Rotabull account (this list is pulled from your ERP system if you are using one, otherwise it is built up in Rotabull as you make sales). If you enter a company name that is not in your list, you can create it. You can also edit the information of any company you select by clicking Buyer Company Details.
Email: The buyer's email.
Line Item: Each line item on your RFQ requires at least a part number and quantity. If the line item is a repair service, you are required to select service type (but not quantity).
The rest of the fields are optional, so you can fill in what is best for your workflow.
NOTE: Rotabull's line item form allows for pasting of data. If you have an RFQ with many items, you can copy and paste them into the form. If the items are in a spreadsheet, you'll want to ensure the columns are arranged in the same order as the line item form, then you'll be able to copy them in. This can save a significant amount of time over having to enter each line manually.
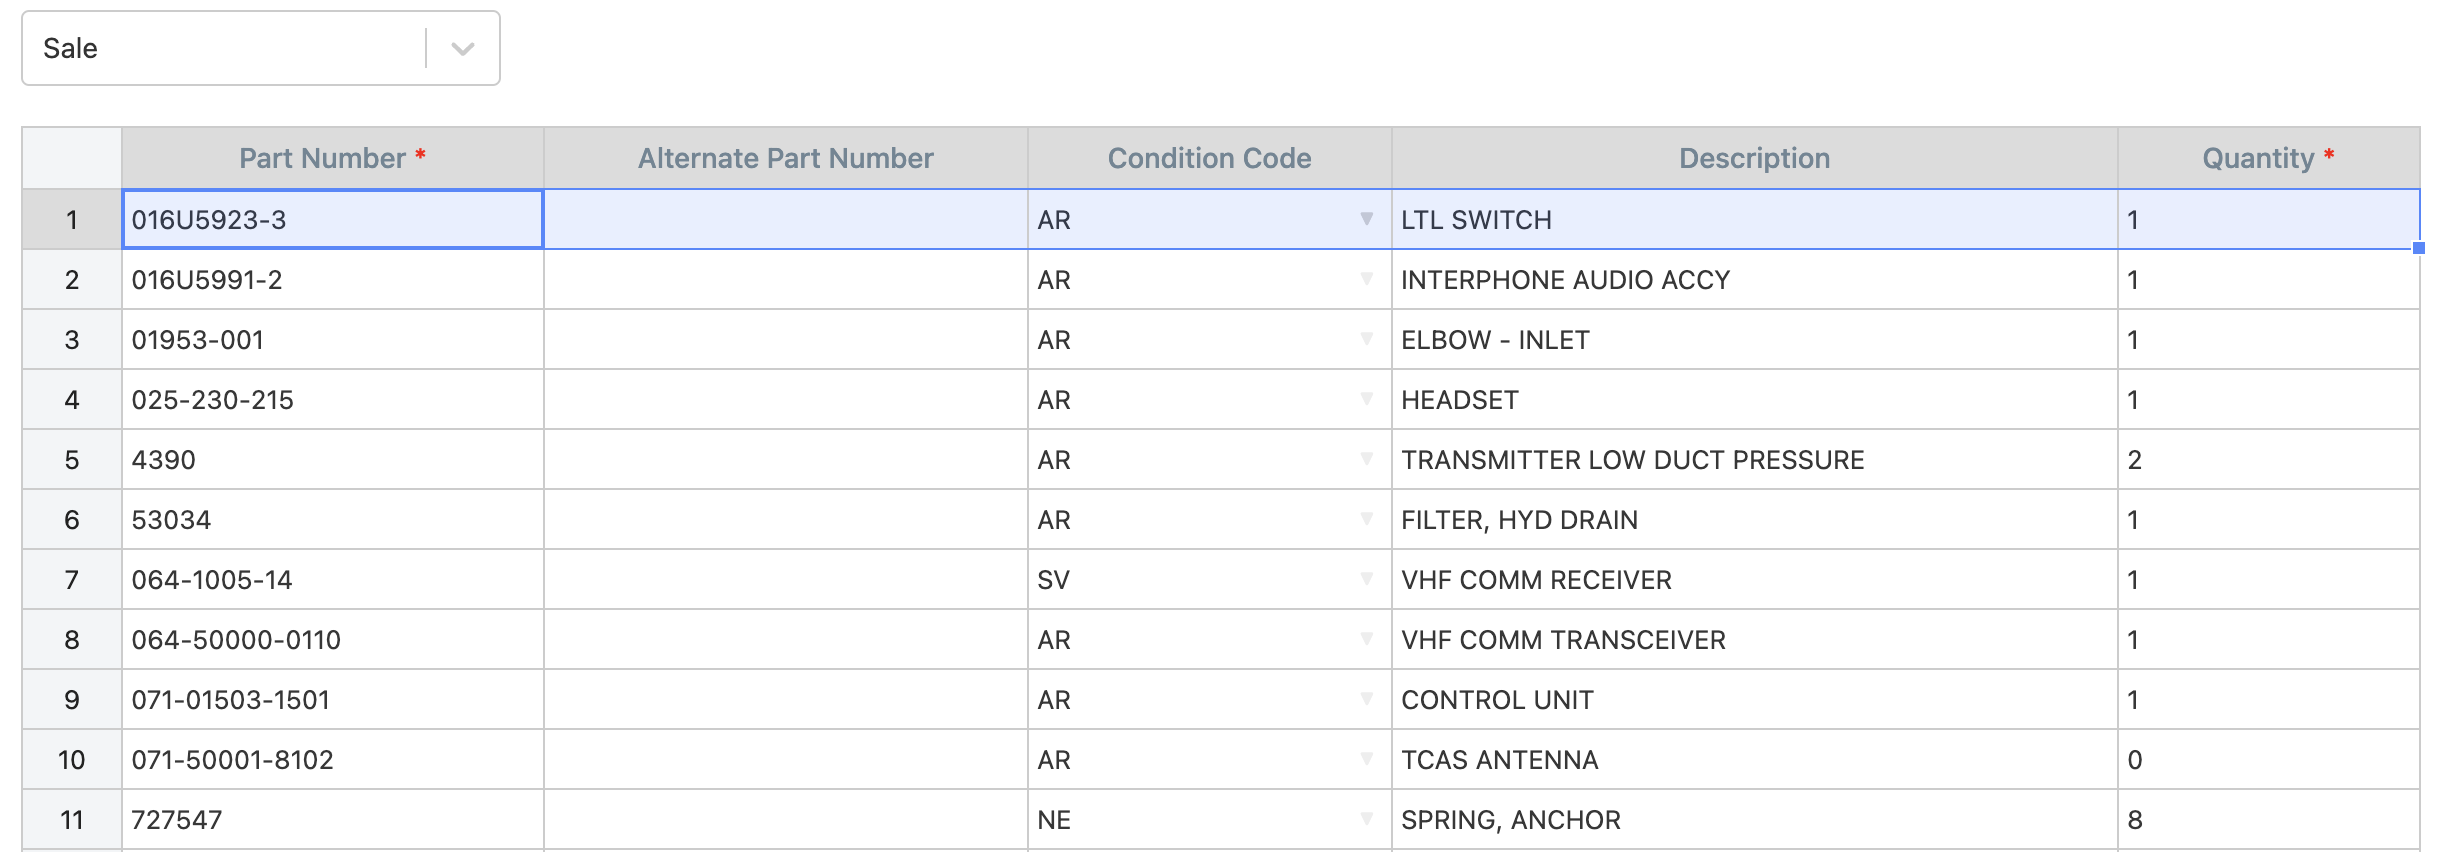
Easily paste many items into the form
At the bottom of the form there is a toggle to Apply Automation Rules to the RFQ. Turning this on will apply any Automation rules you have in your Rotabull account to this RFQ when it is created, such as automatically assigning it to a team member or automatically quoting it.
Once the RFQ form is complete, click "Save and Quote". This will create the RFQ and load the RFQ response form:
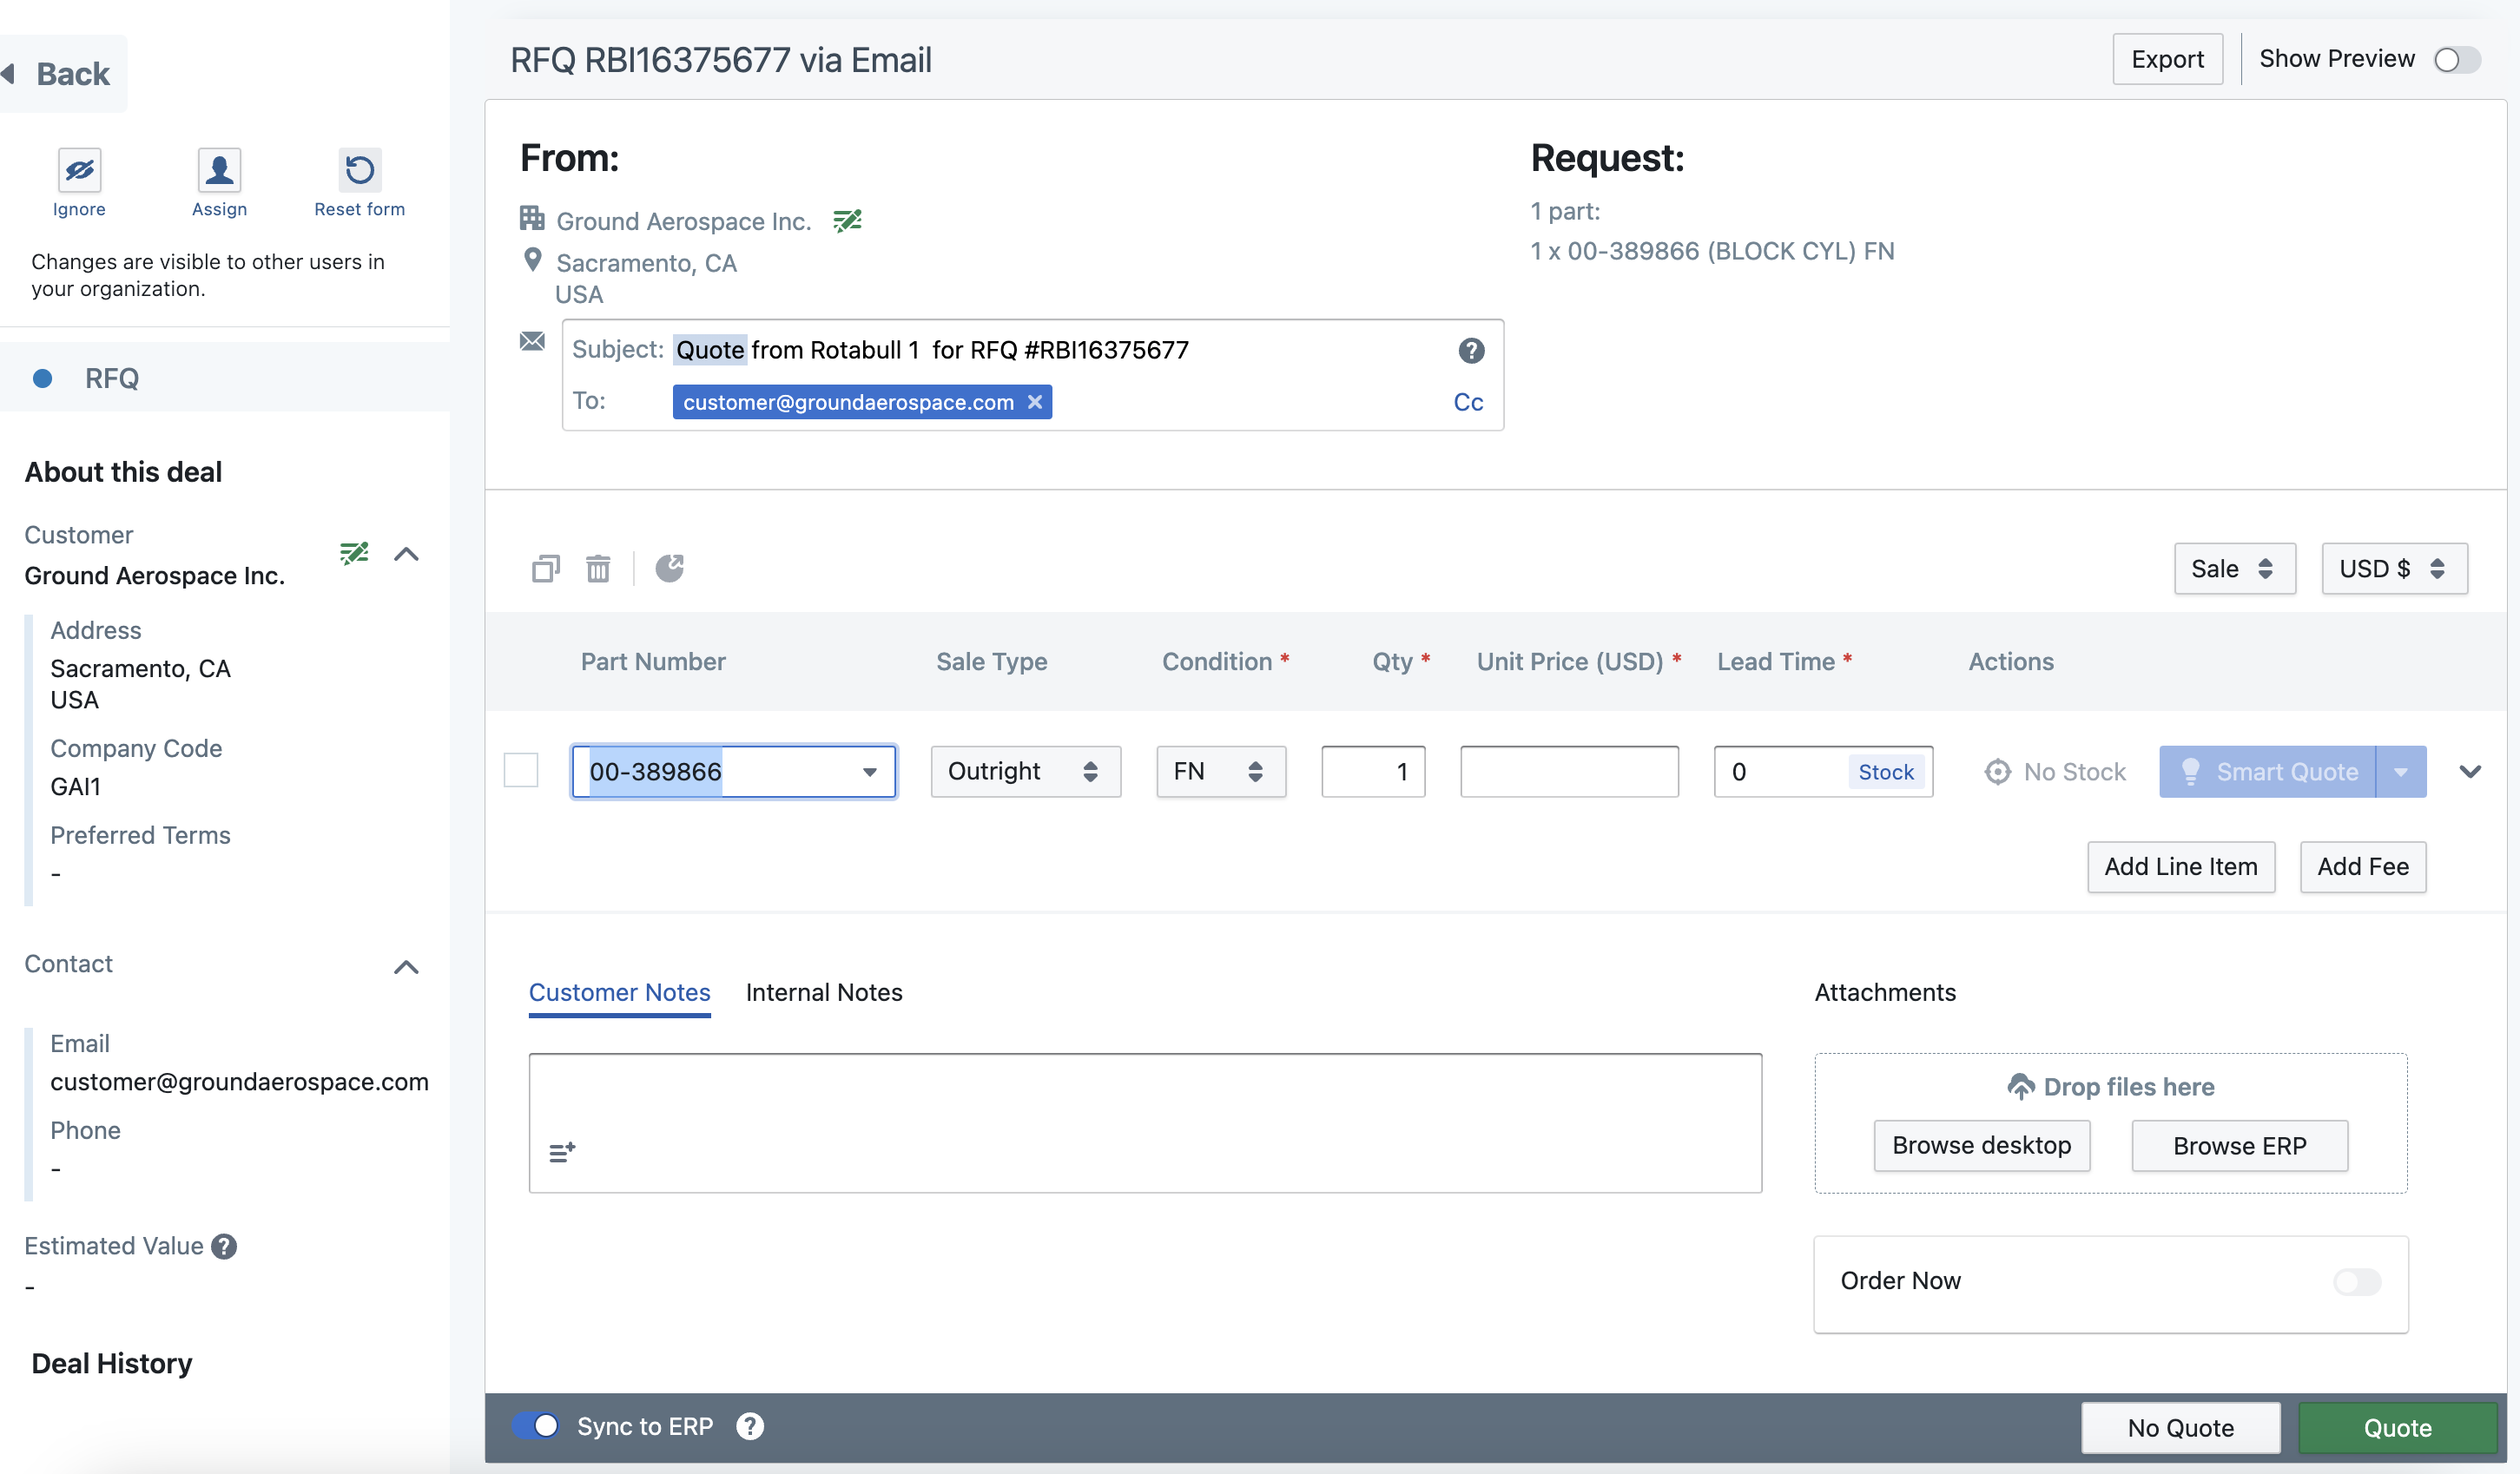
The RFQ has been added to your RFQ inbox (like any other RFQ you receive in Rotabull), so you can quote it immediately or come back to it later.
Manual Deal Creation - Invoice/Payment
If you have payments enabled in your Rotabull account (see here), you can also create an Invoice.
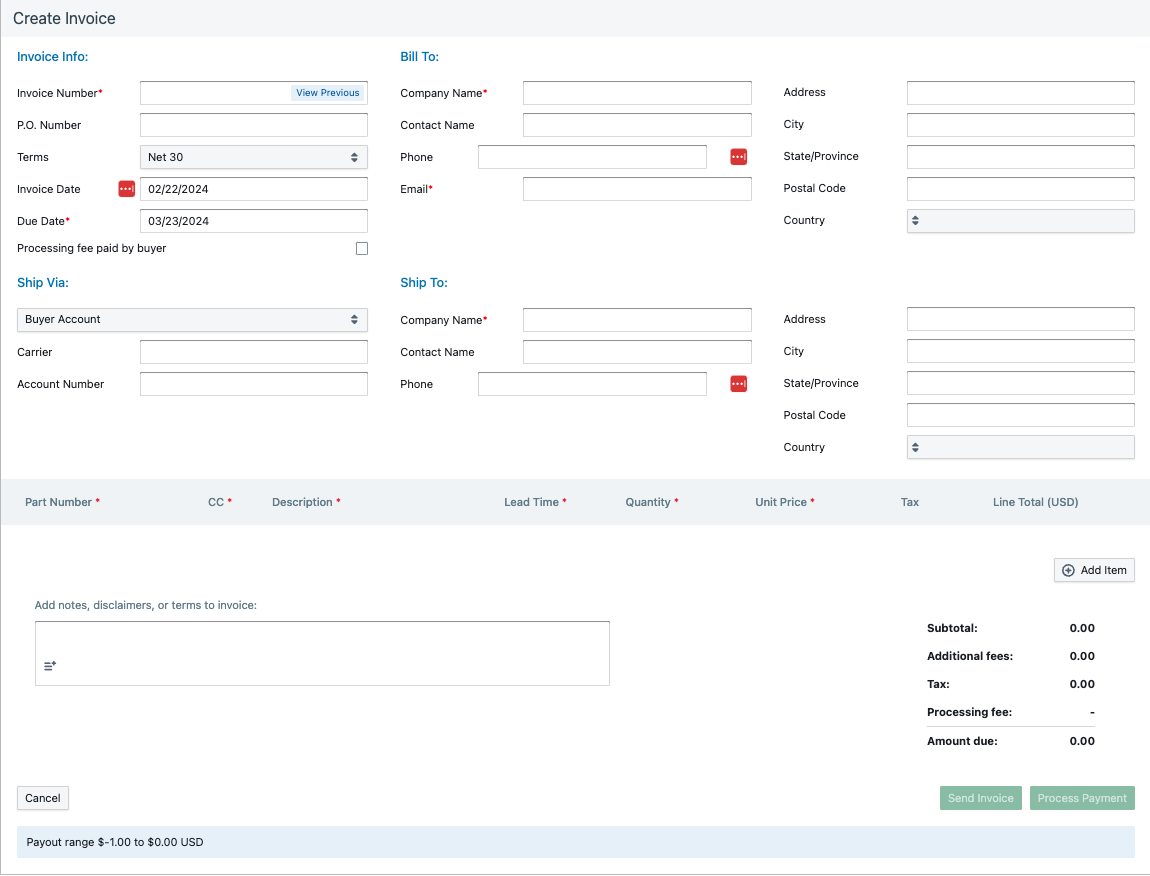
There are several required fields on the Invoice/Payment form:
Invoice Number: This can be anything you'd like (letters and numbers are accepted), as long as it has not already been used in your Rotabull account. Click "View Previous" to see your last used Invoice number, which can be helpful if you'd like to keep the numbers sequential.
Company Name: The buyer's company name.
Email: The buyer's email.
Line Item: One or more complete line items for a part or service is required. Click "Add Line Item" on the right side of the form. Note that you can also add a fee here, if needed.
Ship Via (not a required field): On the left side of the form, "Ship Via" allows you to input a carrier and account number if you are billing the shipping cost to the buyer. This setting is for informational purposes on the invoice, Rotabull will not bill the shipping carrier.
The rest of the fields in the invoice form are optional, so you can fill things out as per your workflow. Once you're done with the form, you can either send the invoice to your customer or process the payment:
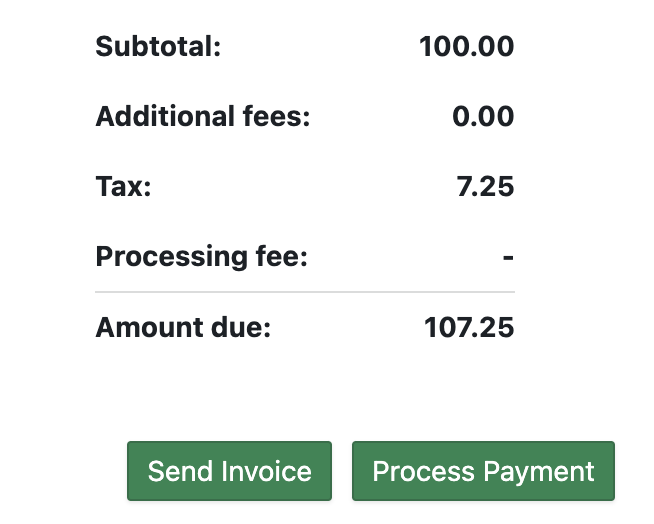
Send Invoice: Choose this option if you need your customer to input payment information. The invoice will be sent via email to the customer and it will include a button they can click to securely pay the invoice in Rotabull's checkout page.
Process Payment: If you already have your customer's payment information, choose Process Payment to go directly to the Rotabull checkout page. From there, you can enter the payment information and complete the purchase. Note that when you choose Process Payment, the invoice form will also be sent over email to the customer.
Updated about 1 year ago
Check out the below link for more information on how payments work in Rotabull