Upload Inventory to Rotabull (manually)
A quick start guide for uploading your inventory to Rotabull via spreadsheet
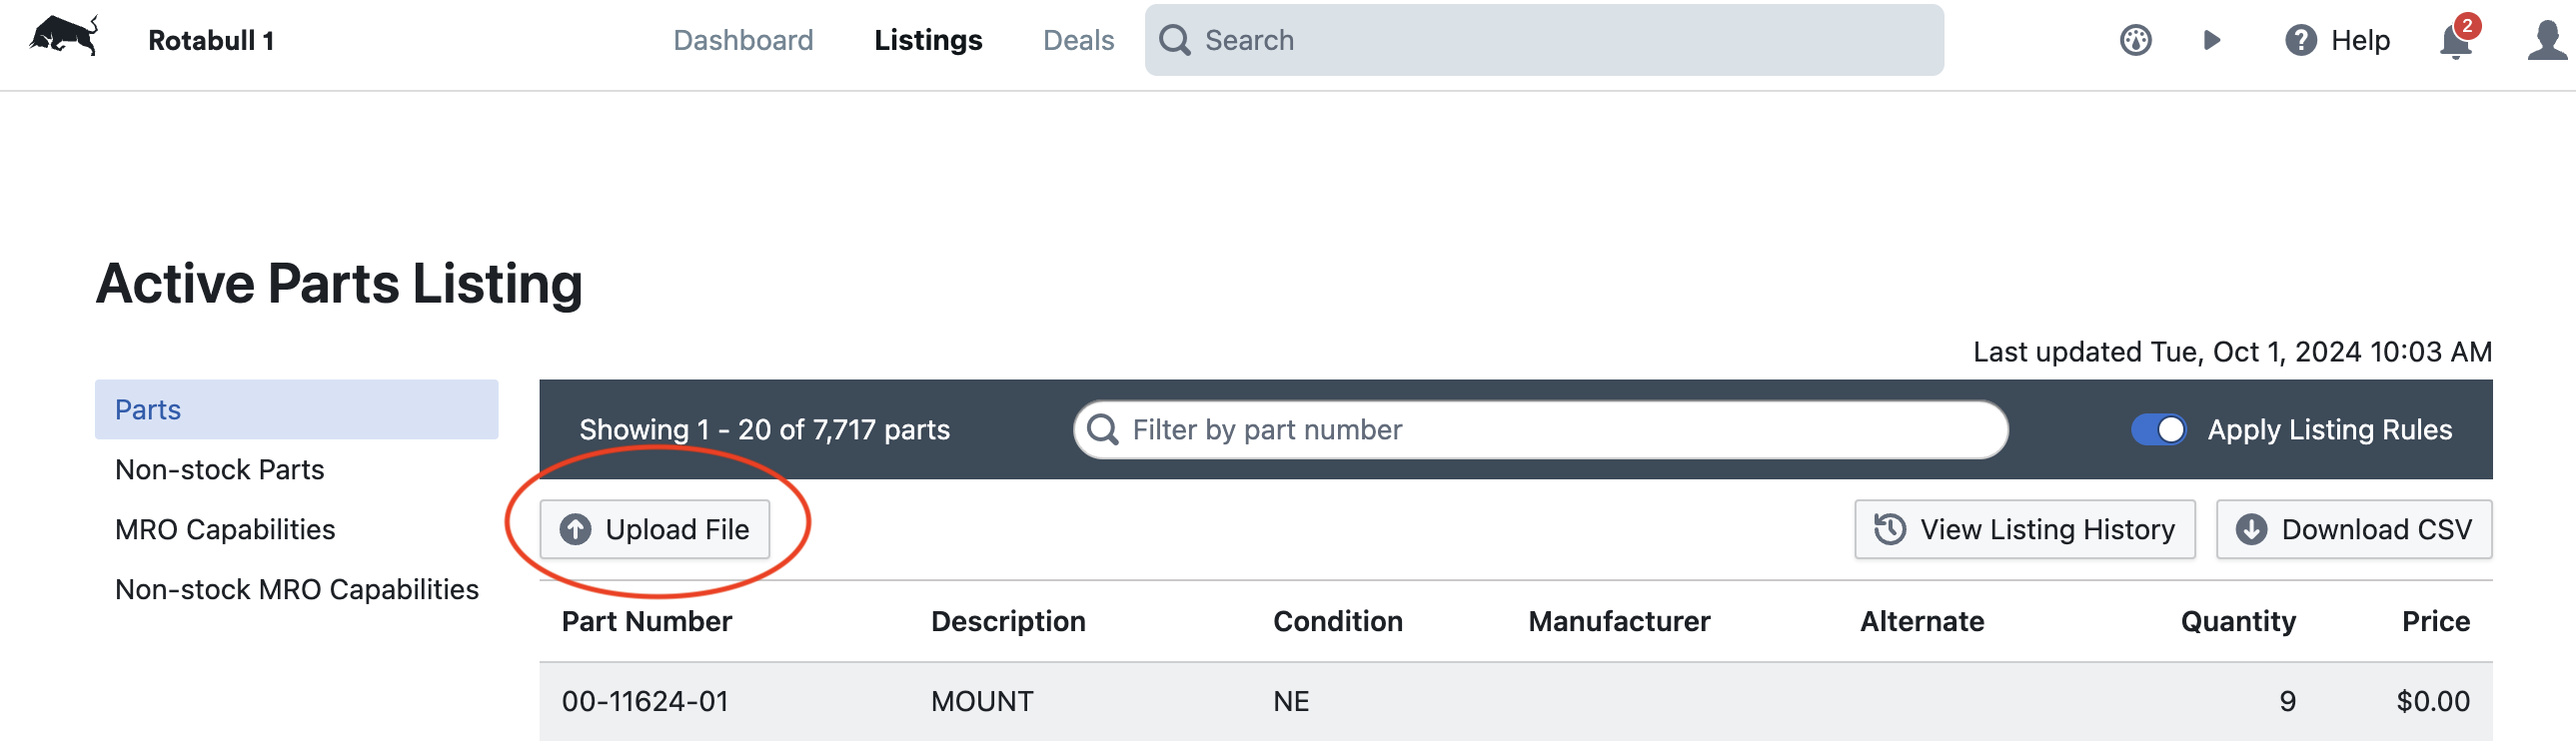
- Go to the Listings section in Rotabull and click "Upload File":
- This will bring you to the uploader. Select the type of import you are uploading (inventory, MRO capabilities, or Non-stock):

- Click "Choose file" and select the spreadsheet on your computer that you'd like to upload. Your spreadsheet must contain the required columns described on the right and these columns must have data in every row. The optional columns, if present, do not require data in row.
- Click "Upload spreadsheet"
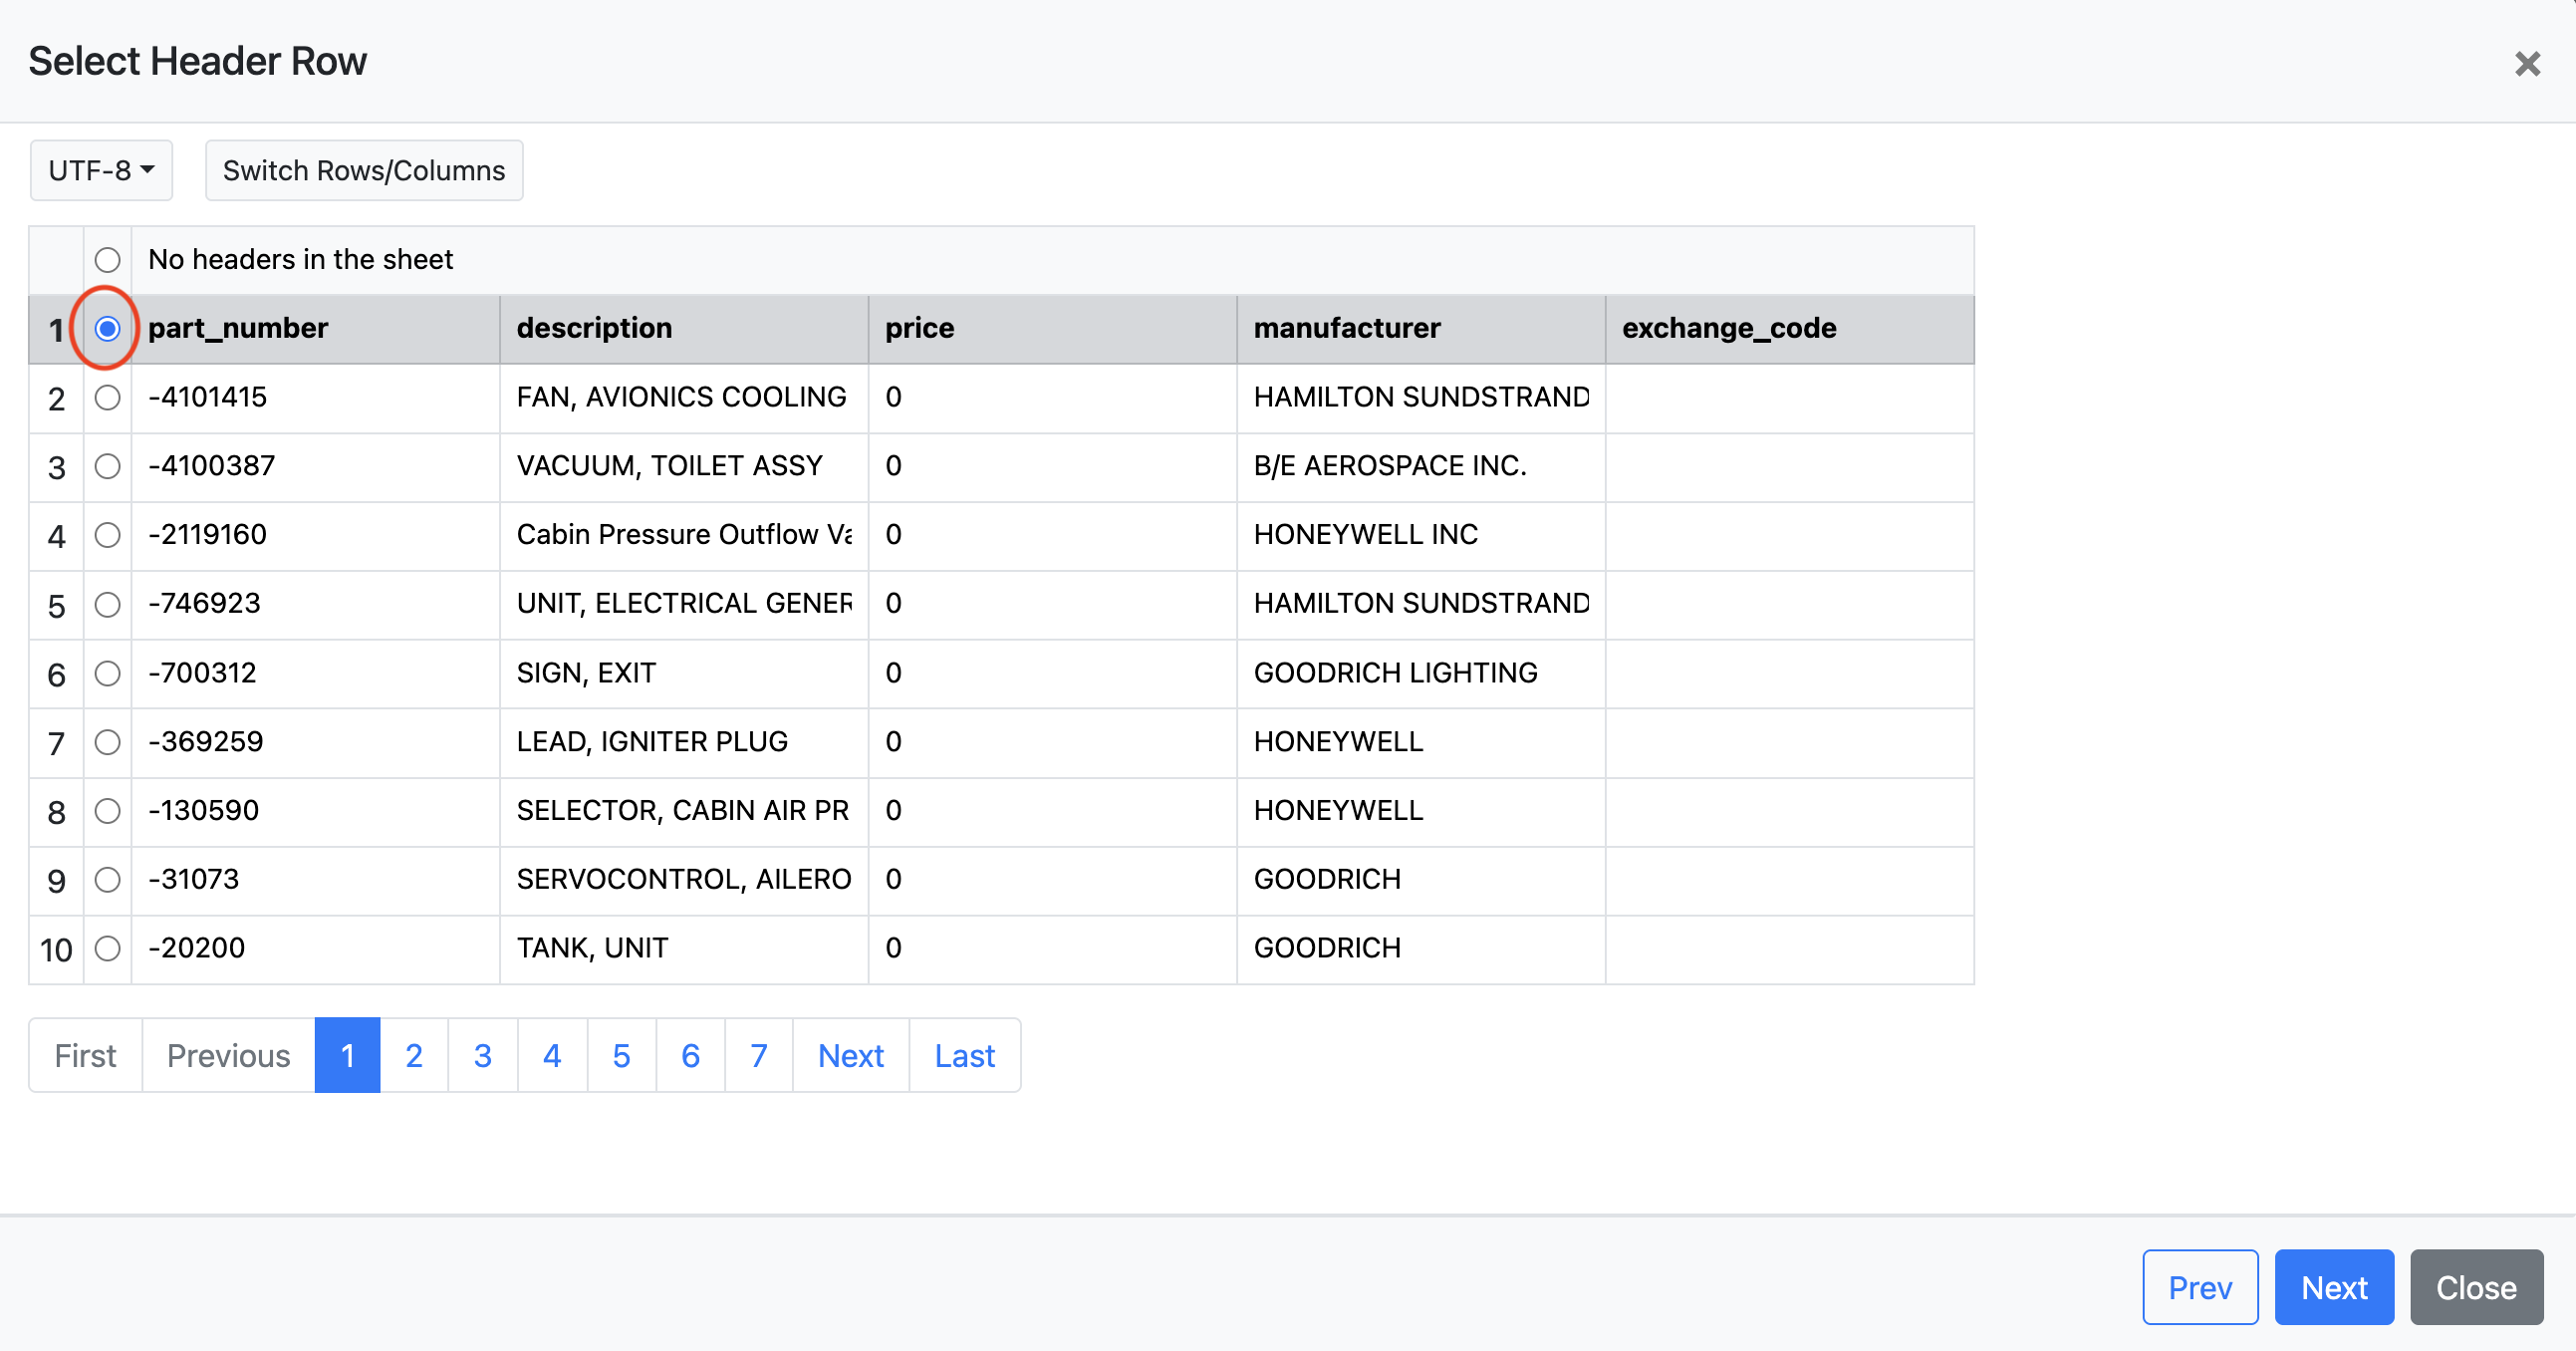
- The next window that comes up is used to tell Rotabull which row contains the column headers. This should be selected automatically but you can change it if necessary. Once you've checked that, click Next in the bottom right:
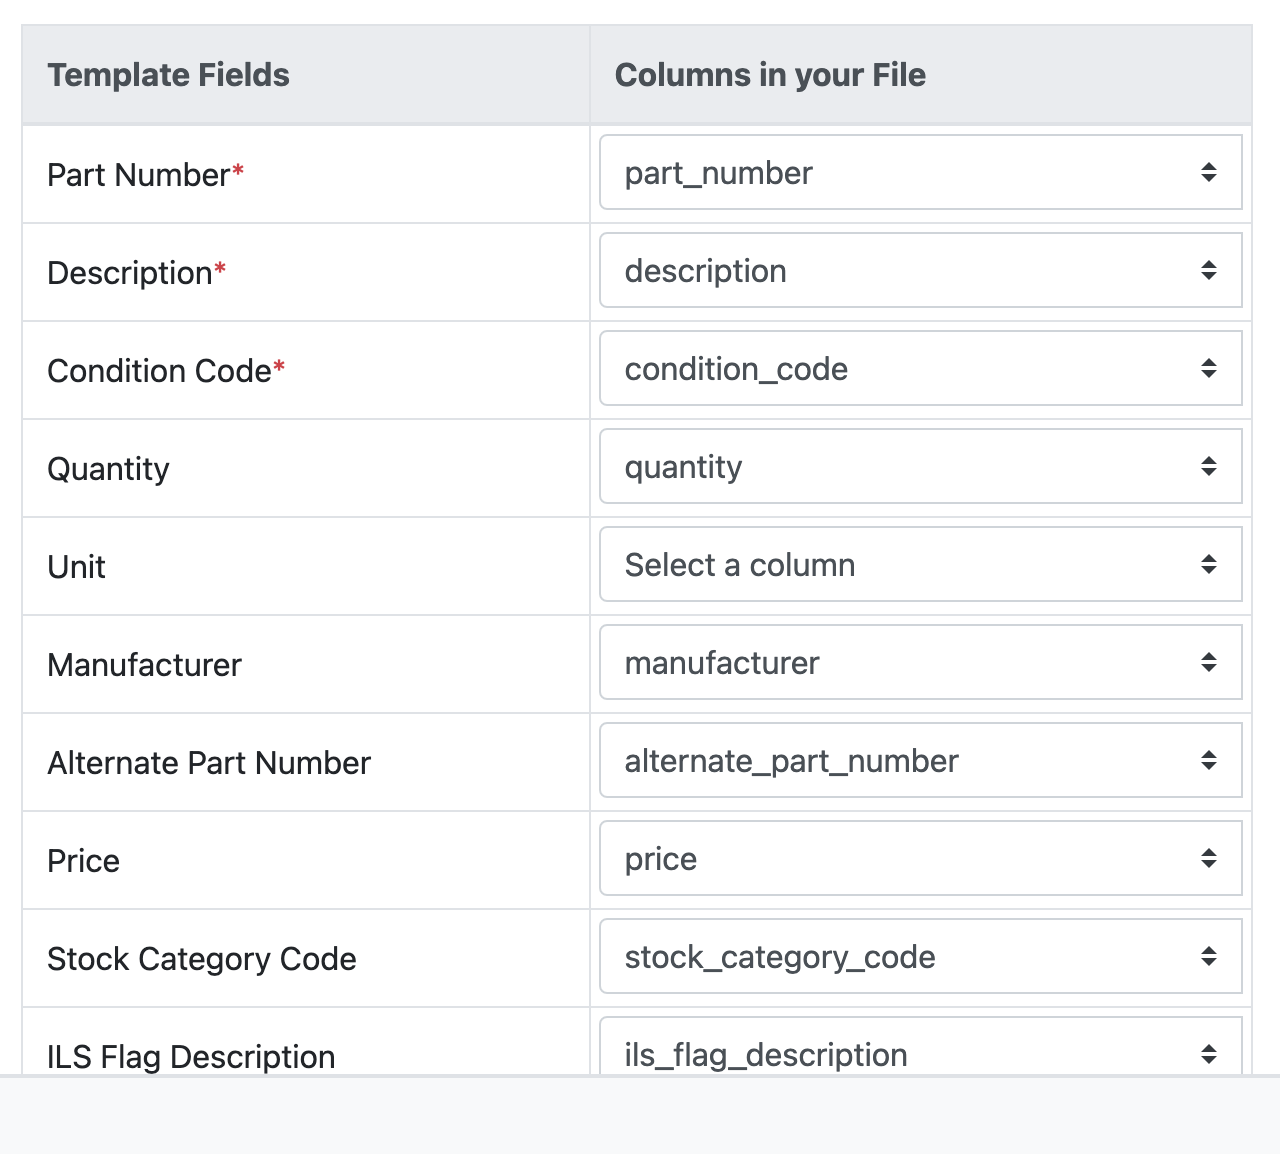
- You will now see the Map Columns window. This is used to tell Rotabull which column in your spreadsheet matches to which data field in Rotabull. Rotabull attempts to match these automatically but you may need to make changes. If one of the Template Fields isn't matched to the correct column in your file (or if it's not matched), just click the drop down to select a different column. When you're done with that, click Next at the bottom:
- This will bring you to the final stage of the process which is "Verify Data". The "Verify Data" window can be used to confirm that your data is ready for upload. Any rows with invalid data will be highlighted in red. You can edit fields here or remove rows. Clicking "Show all rows" will change the view to "Invalid rows only", where you'll be able to quickly see any problematic rows:
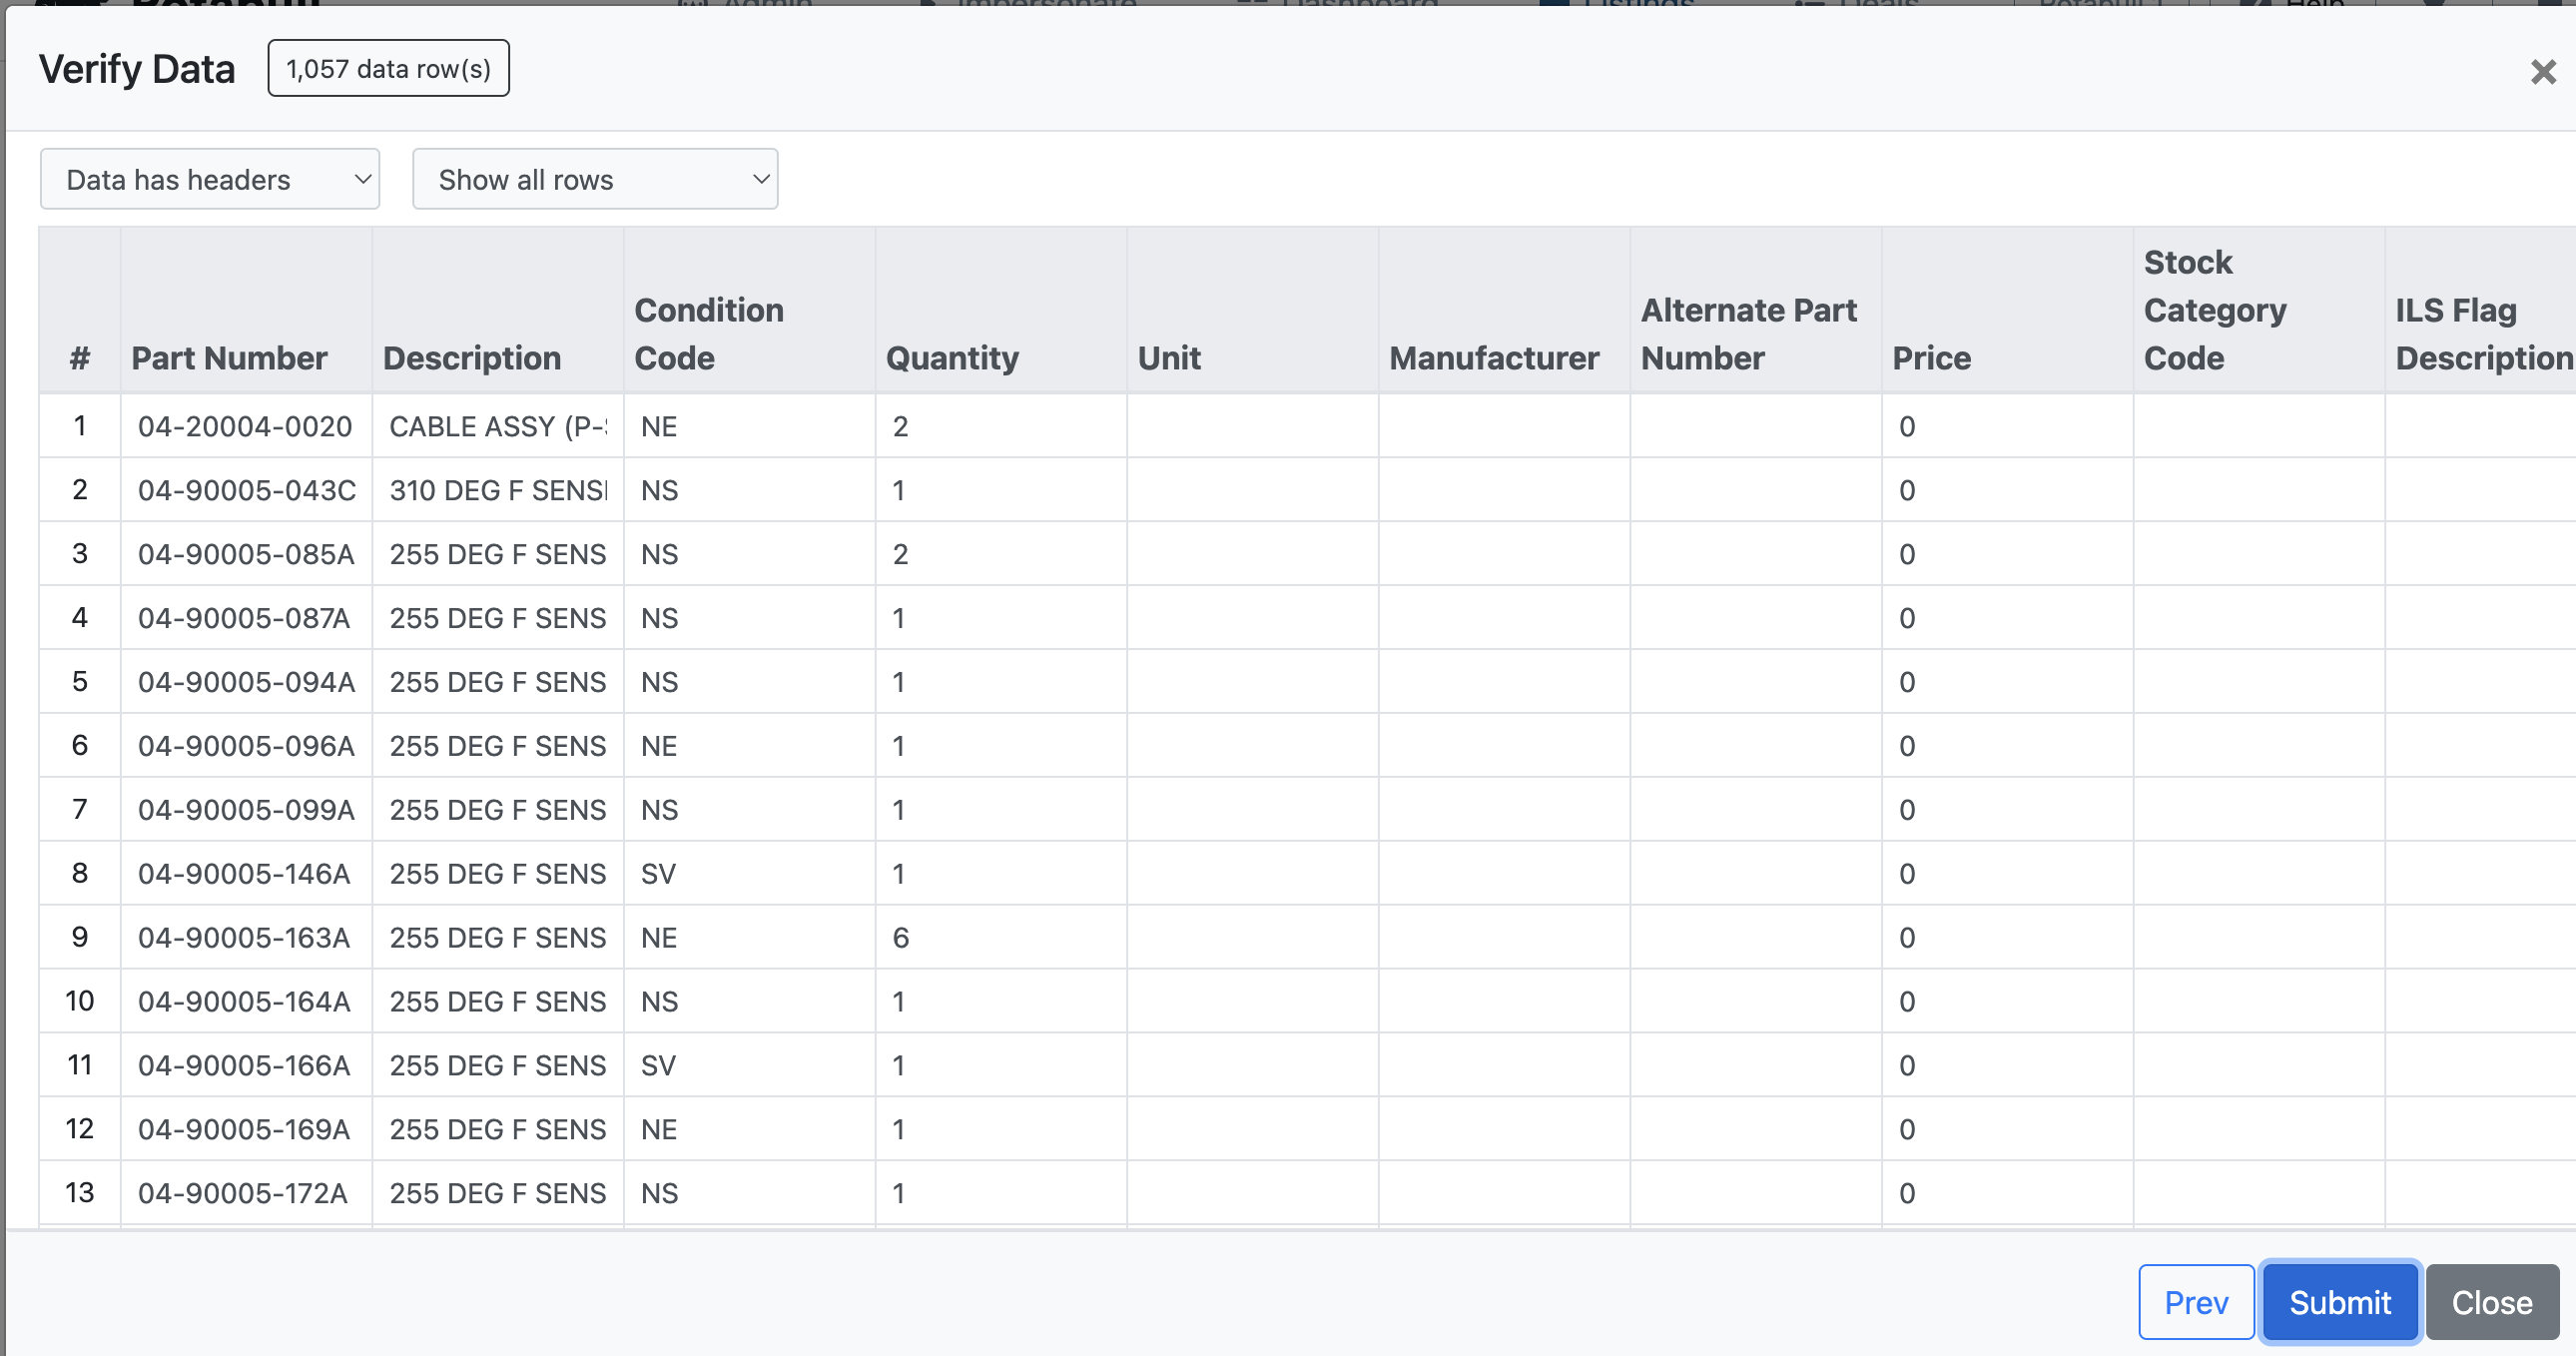
- After you've fixed any invalid data (or if there is none), click Submit to begin the upload. Upload times can vary based on file size and system load.
For a more detailed description of this process, please see our guide on using Rotabull without a connected ERP system here.
Updated 10 months ago
Did this page help you?