No ERP System
If you manage your inventory and track capabilities primarily using a spreadsheet (or an accounting system like Quickbooks Online), you can still benefit by using Rotabull as a sales system.
The main difference when using Rotabull without a connected ERP system is that you will need to upload your stock and related data into the system. There a couple of ways to do this, the easiest is to access the Products page where you can manage all your data in one place:
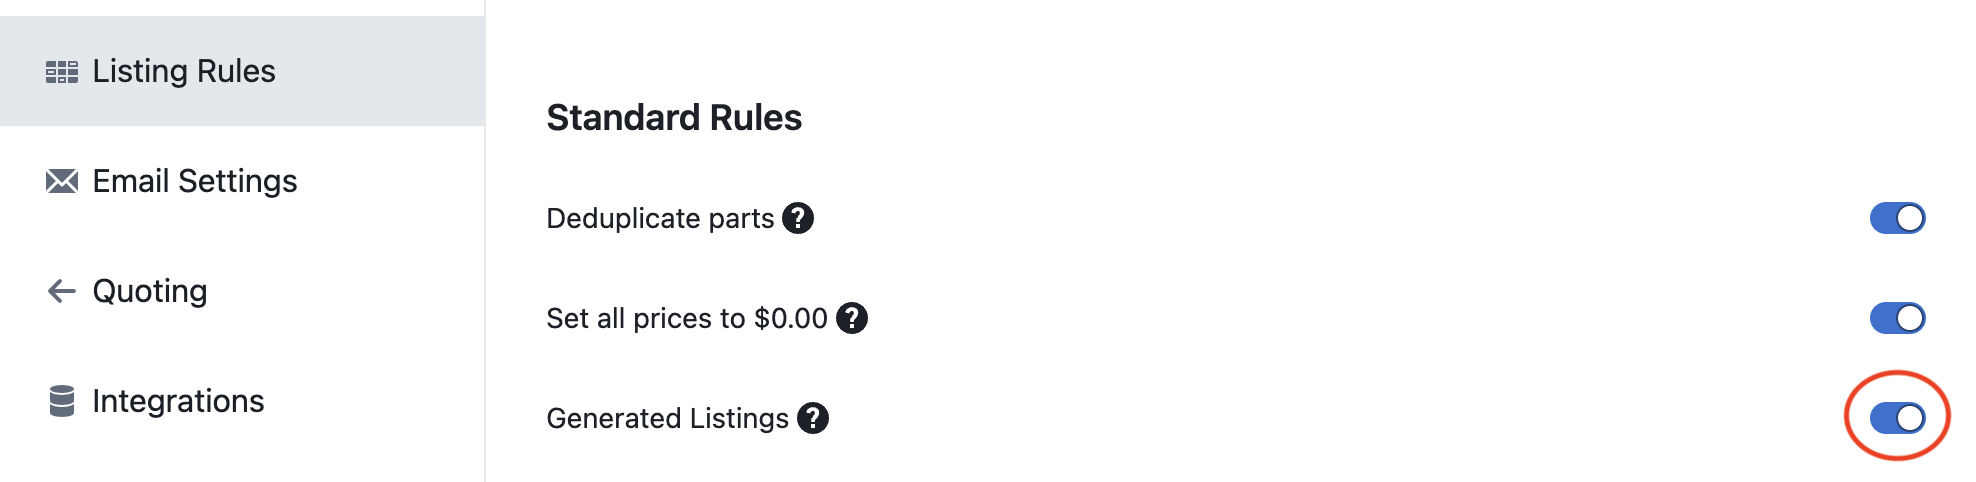
To access the products page, you first need to turn on Generated Listings in the Listing Rules Settings. This is because the products page will generate listings from your stock and other data that can be synced to marketplaces.
Once you have Generated Listings turned on, the Products Page will replace the main Listings Page in Rotabull. You can then access the Products Page by clicking on Listings at the top of your Rotabull screen:

The Products Page is only available for users that do not have an ERP system connected to Rotabull. If you do have an ERP system connected, turning on Generated Listings will not enable the products page. It will instead generate listings using the data synced from your ERP.
Uploading Data in the Products Page
There are six sections on the left side of the product page. Clicking on any section will display the corresponding data in your Rotabull account, if it exists. Some of these sections require that you upload data to them.
Listings - Parts and Listings - Repairs: These are the marketplace listings that Rotabull will generate from your other data. You do not need to upload any data here. If you'd like to have Rotabull sync these to your connected marketplaces, you'll want to turn on the marketplace sync in the Integration Settings.
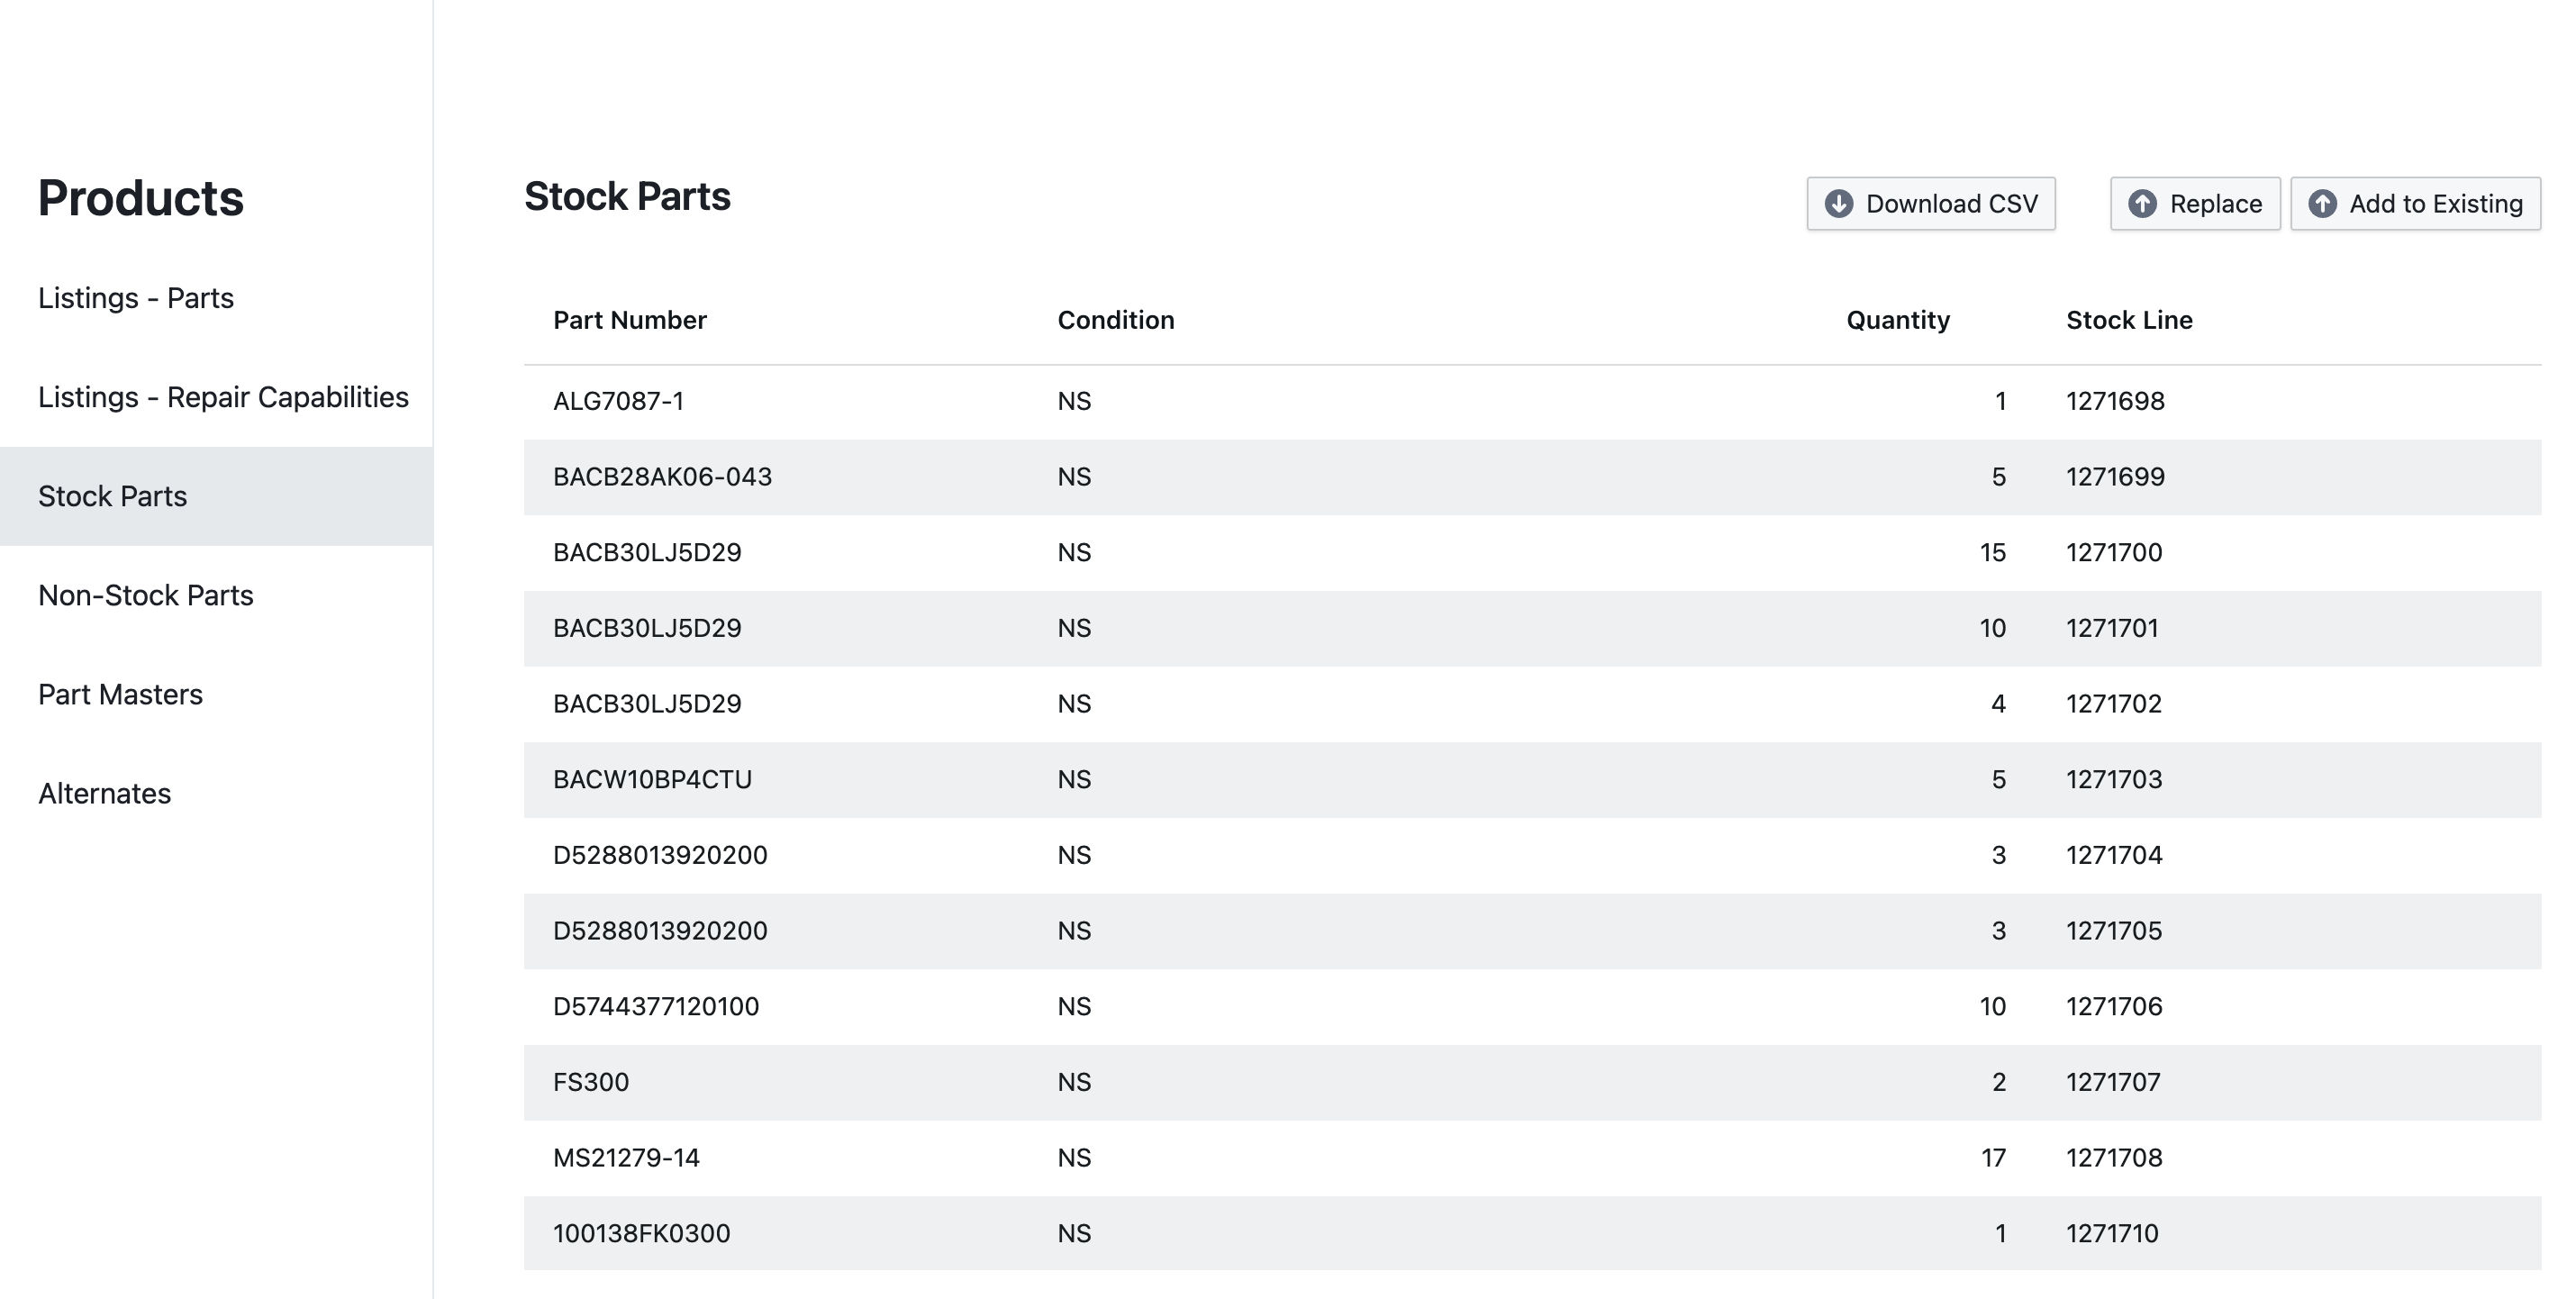
Stock: Your inventory data. Stock lines that you upload here will be viewable via the "Stock" button located on the line items when viewing an RFQ.
Non-Stock Parts: Here you can upload parts that you'd like to add to your listings but are not part of your stock.
Part Masters: Upload Part Master data. Some data from your part masters will be used to generate listings.
Alternates: You alternate part number data. Alternate parts will be used when generating listings. Your alternate parts will also be displayed when responding to an RFQ.
Uploading Files
To upload any type of data in the Products page, just navigate to the desired section and click "Replace" or "Add to Existing" in the top right. You will need to upload a spreadsheet.
- First, double-check that your spreadsheet matches the required format for Rotabull. It can be an Excel spreadsheet or CSV. Required and optional columns for your spreadsheet can be found here, the requirements differ depending on the type of data you are uploading. Required columns must have data in all rows, the optional columns can have empty rows or be omitted entirely.
- Click "Replace" or "Add to Existing" to open the uploader. Click to select the spreadsheet you are uploading.
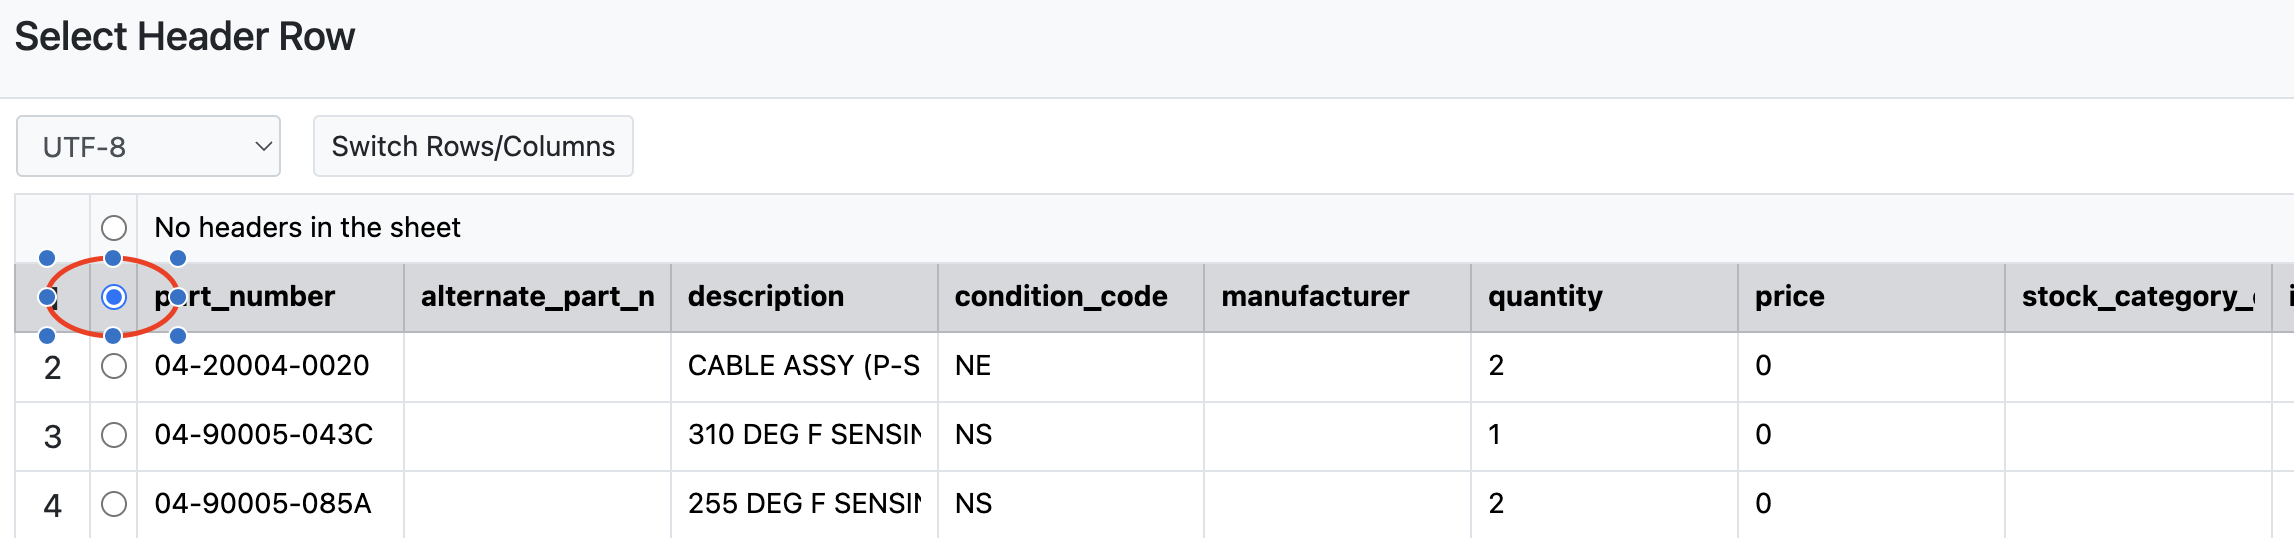
First, check that Rotabull has selected the correct row for the header (column names), then click Next.
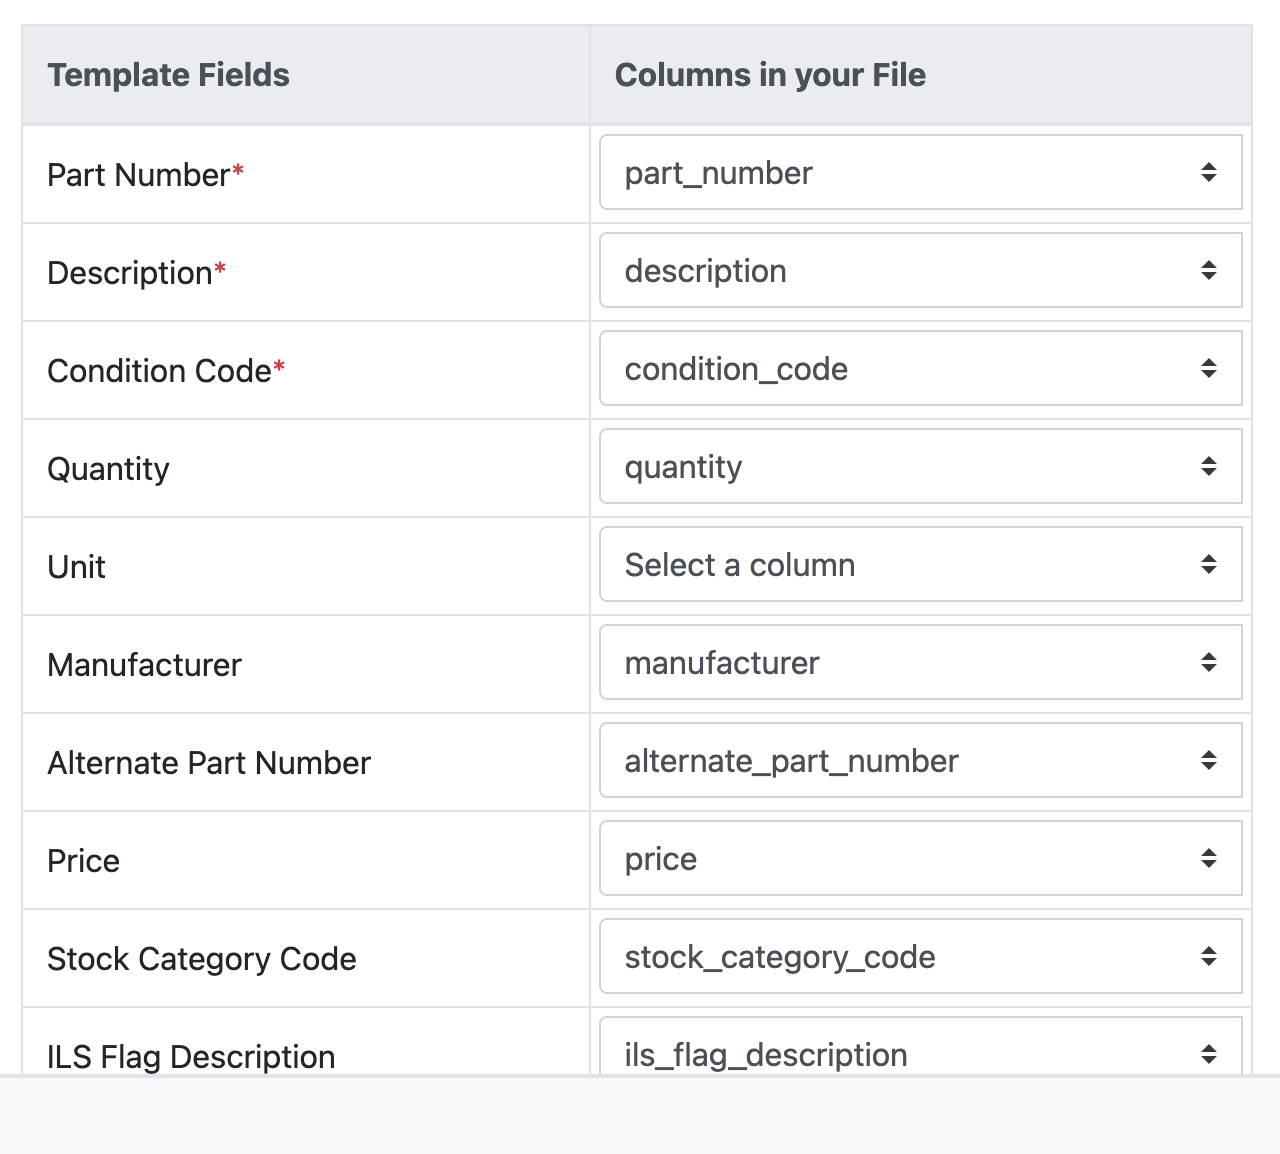

On the next screen, you'll want to manually verify that Rotabull has identified the correct column names for each Template Field. If the "Columns in your File" doesn't exactly match the column names in your spreadsheet, then click the dropdown to see other options. You should be able to select the correct column name here, if not please double-check the format. For assistance, reach out to [email protected].
Note: Some of the Template Fields/Column Names are optional and can be ignored if they are not in your spreadsheet. The required fields will have a red asterisk next to the name of the template field.
From here, click Next to view a full preview of your spreadsheet:
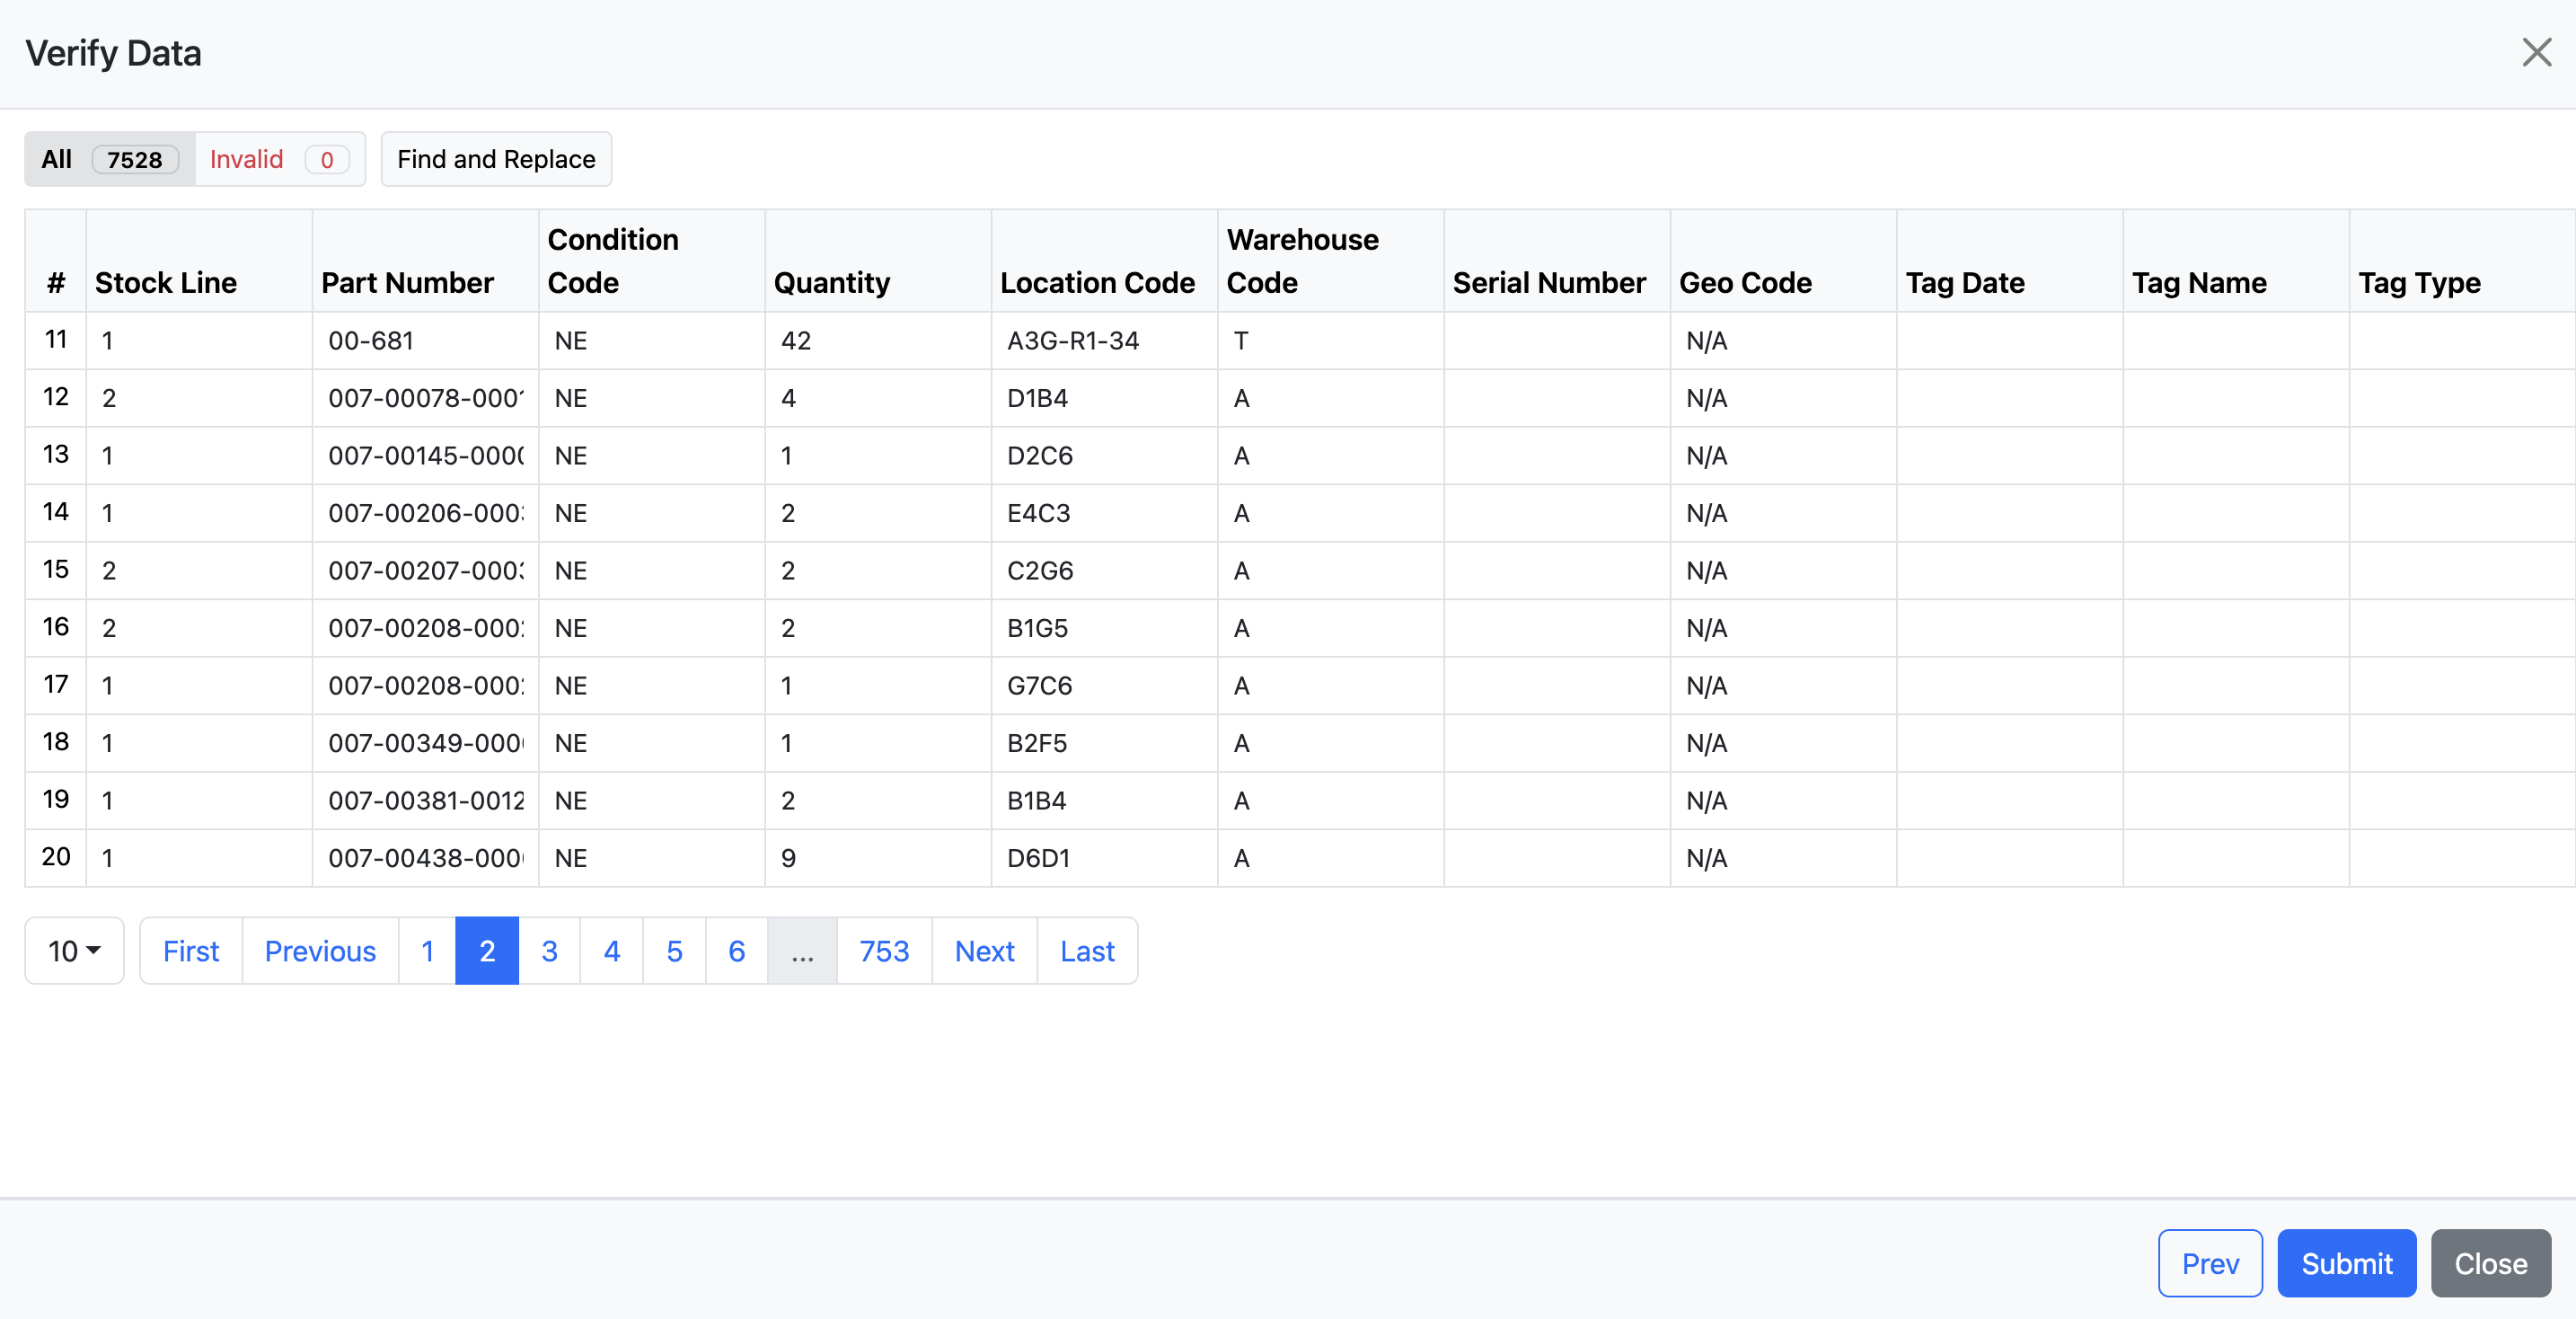
Click the "Invalid" in the top left to see if any of the rows in your spreadsheet need corrections before submitting the file. Invalid fields will be highlighted in red; you can choose to correct the errors or omit those rows entirely. If everything looks correct, click Submit to begin the upload.
Updated 3 months ago